Storage Service Credentials
Topic:
Storage
Overview
Arcus users can generate tokens (credentials) in order to securely access storage services directly from a host in an active Deployment Run using third party clients. These credentials are unique to users, reflect their roles and permissions, and last for a period of time determined by the cloud storage provider. This approach provides enhanced security with a full audit trail and reduces the management overhead and credential sprawl that often occurs in cloud providers.
Credentials can be generated via the Arcus web portal and the API. For the purposes of this article, we will focus on the Arcus web portal.
Generating Storage Service Credentials
- Launch a Deployment Run into a cloudspace that has an available storage service. If your deployment run has no storage service available, you can create one by following the steps here
- Select one of the hosts. These credentials are issued to a specific host, and access is enforced at the cloudspace boundary.
- Select Services on the host options page and click the Add Services button.
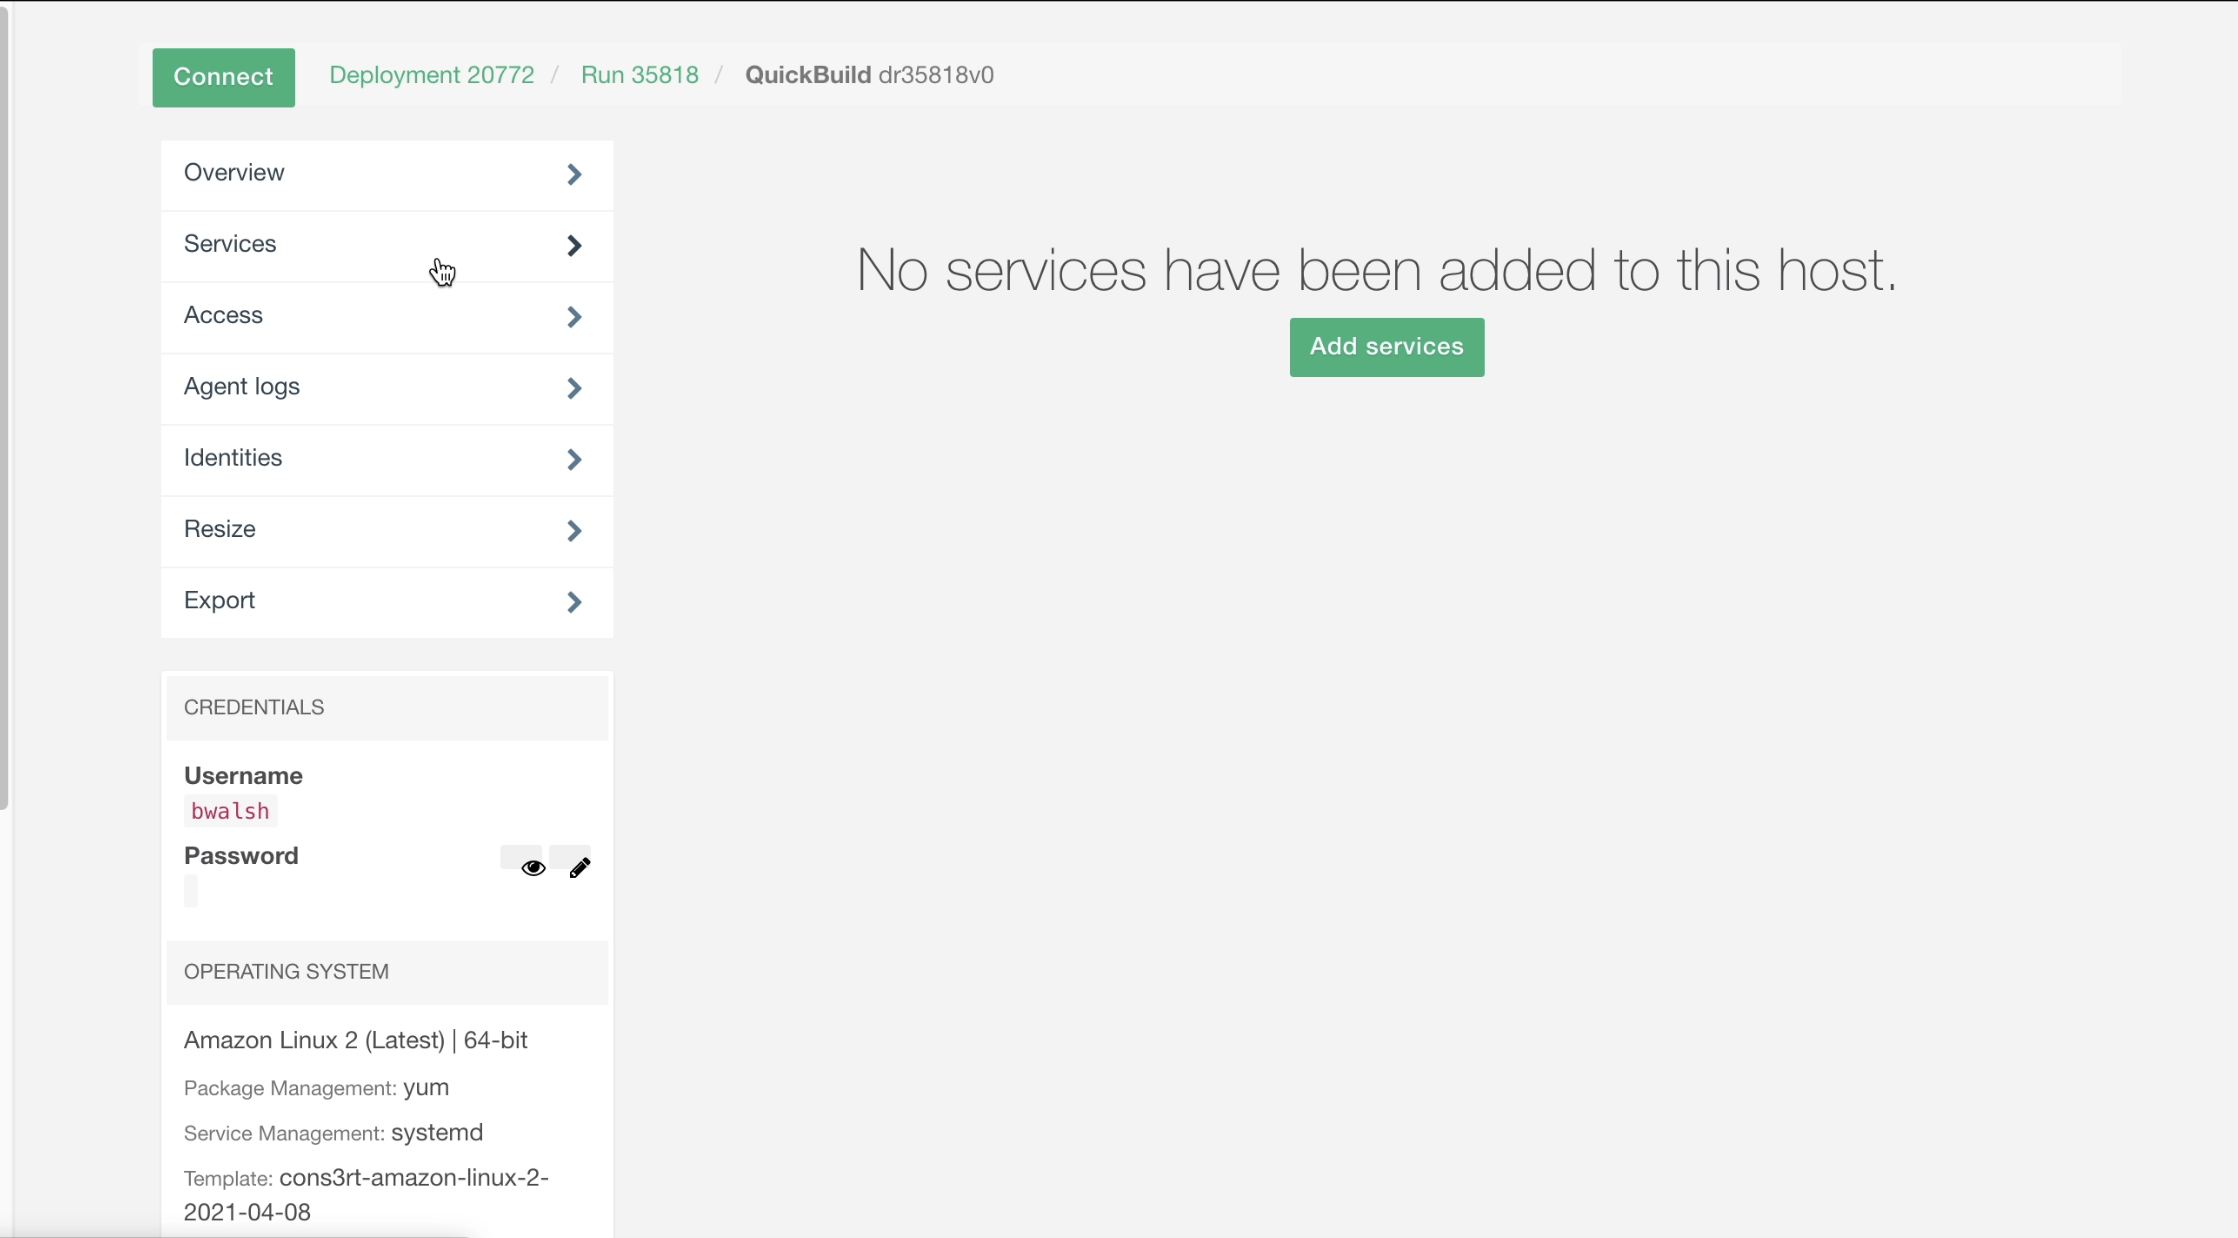
- Doing so will take you to a page showing all the storage services that are accessible to the selected Deployment Run
- Check the box next to the storage service you intend to access
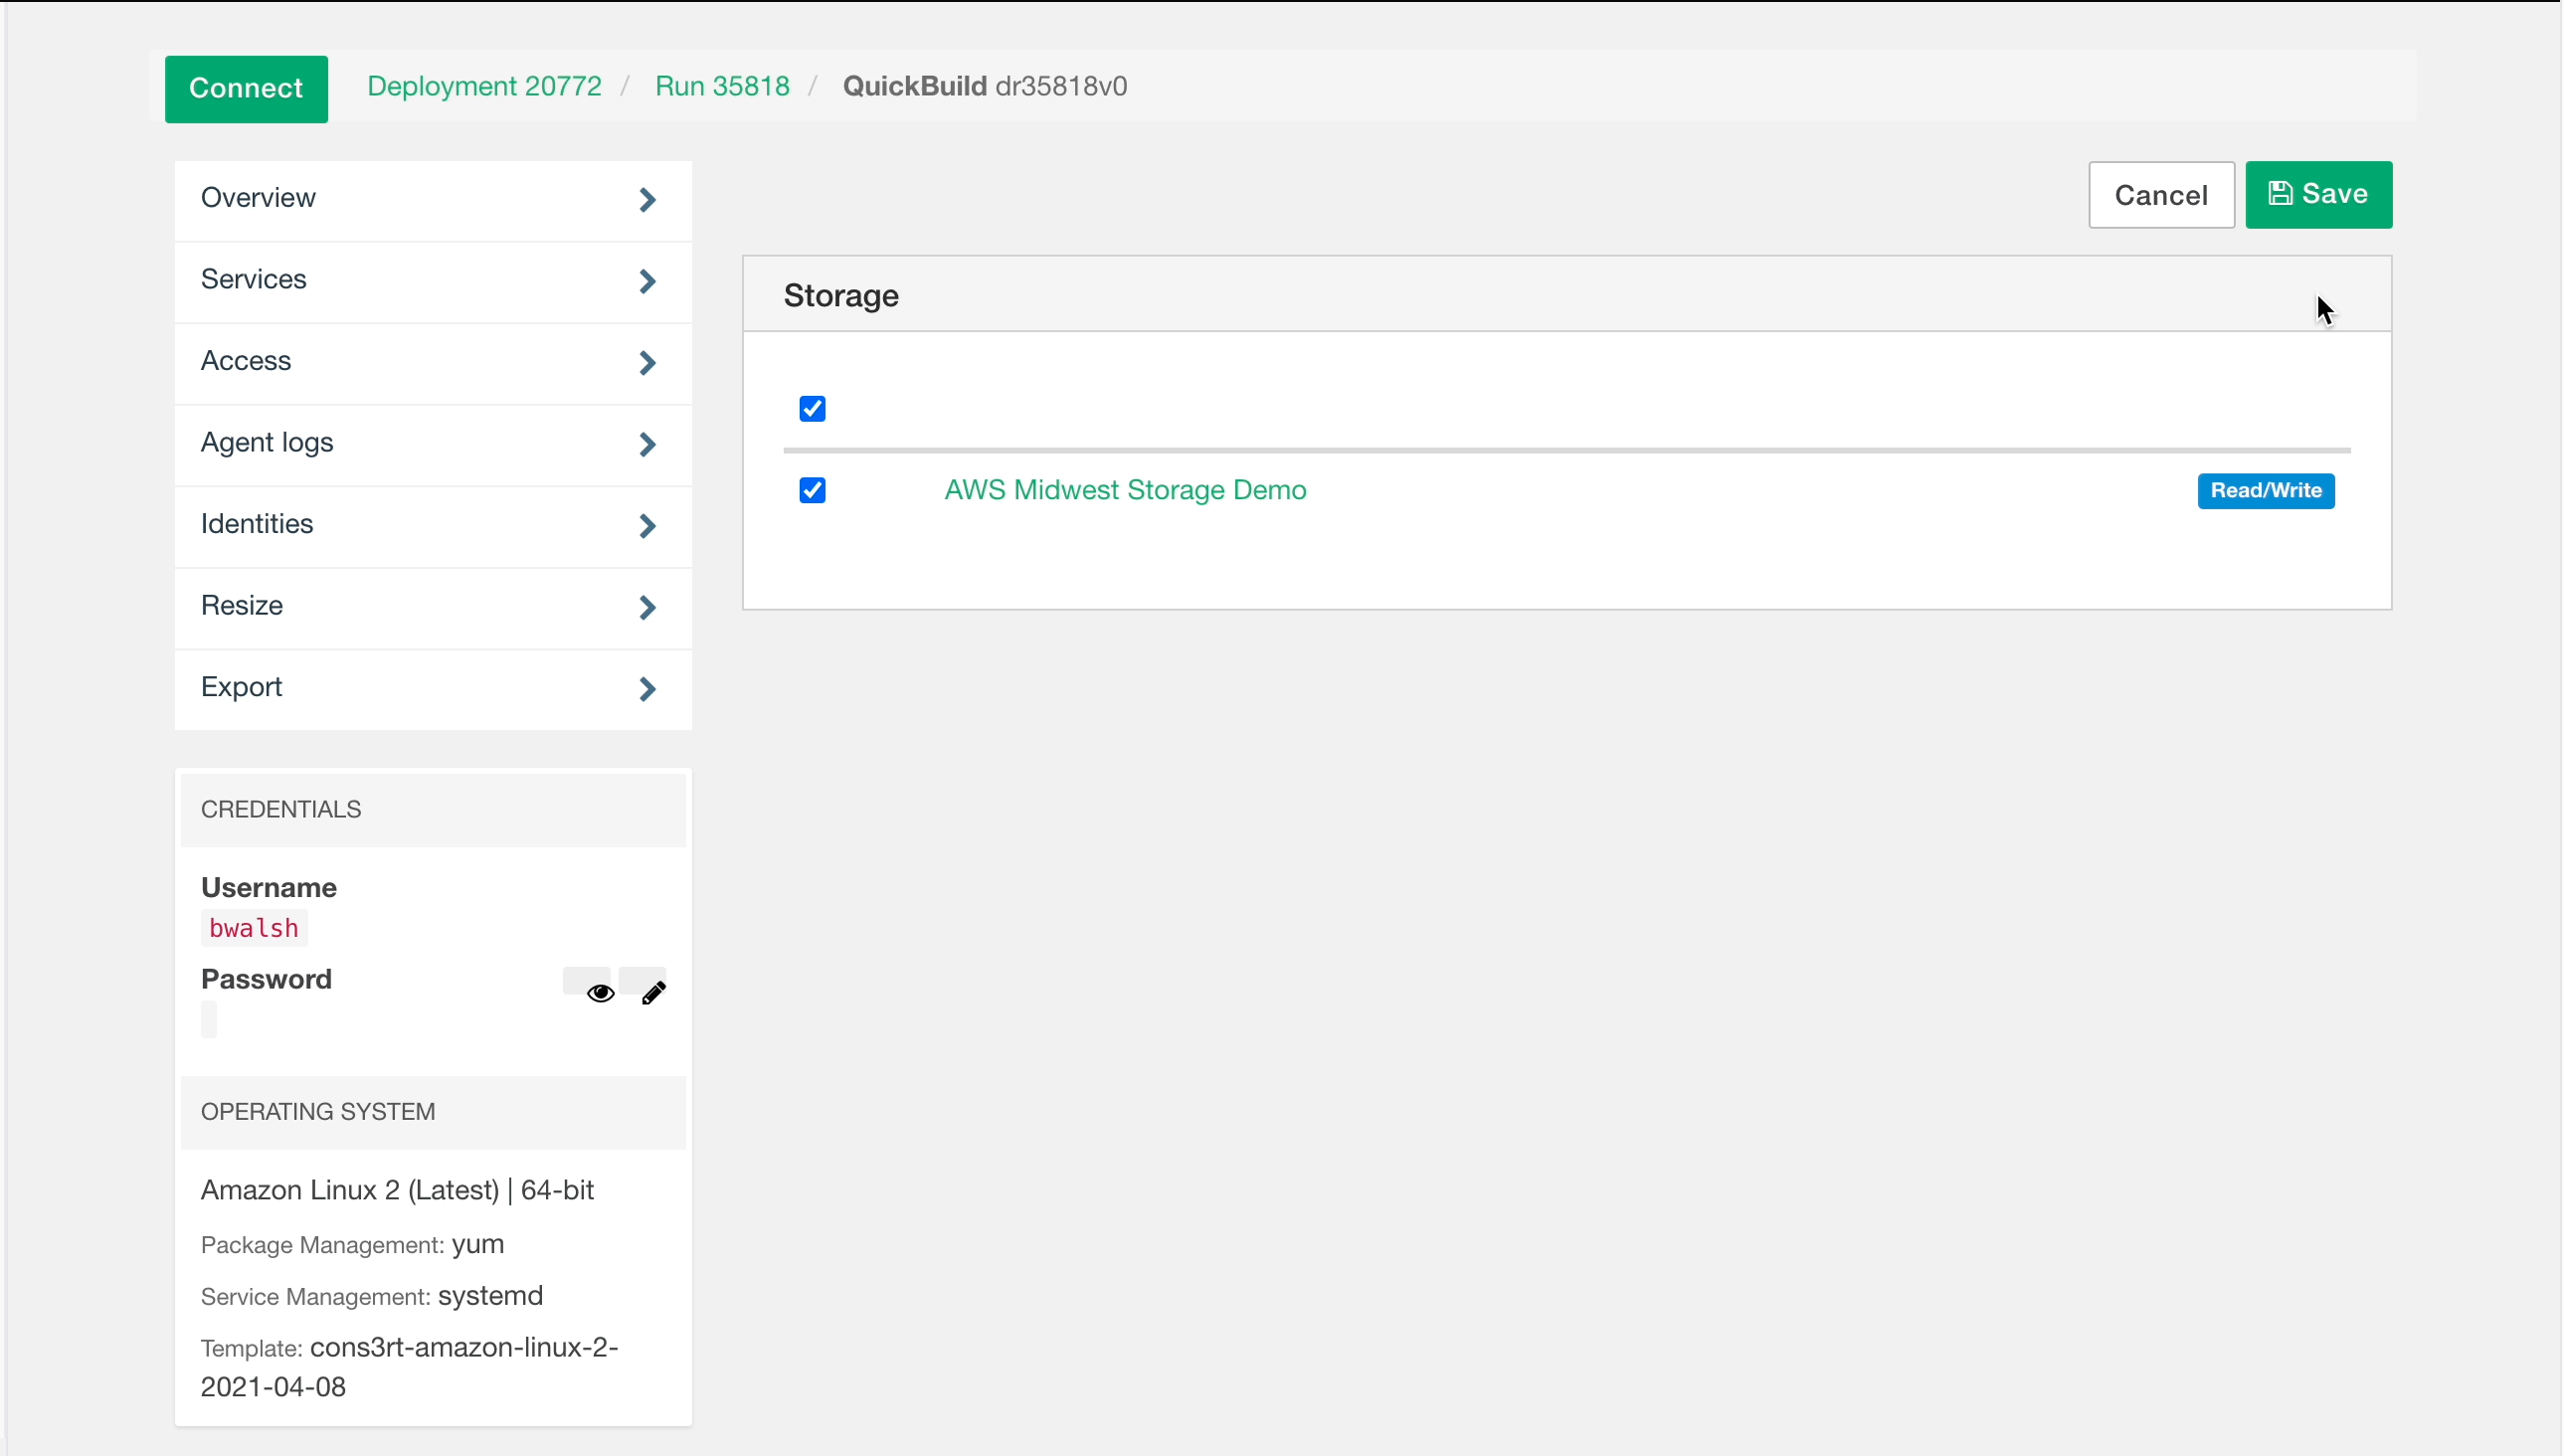
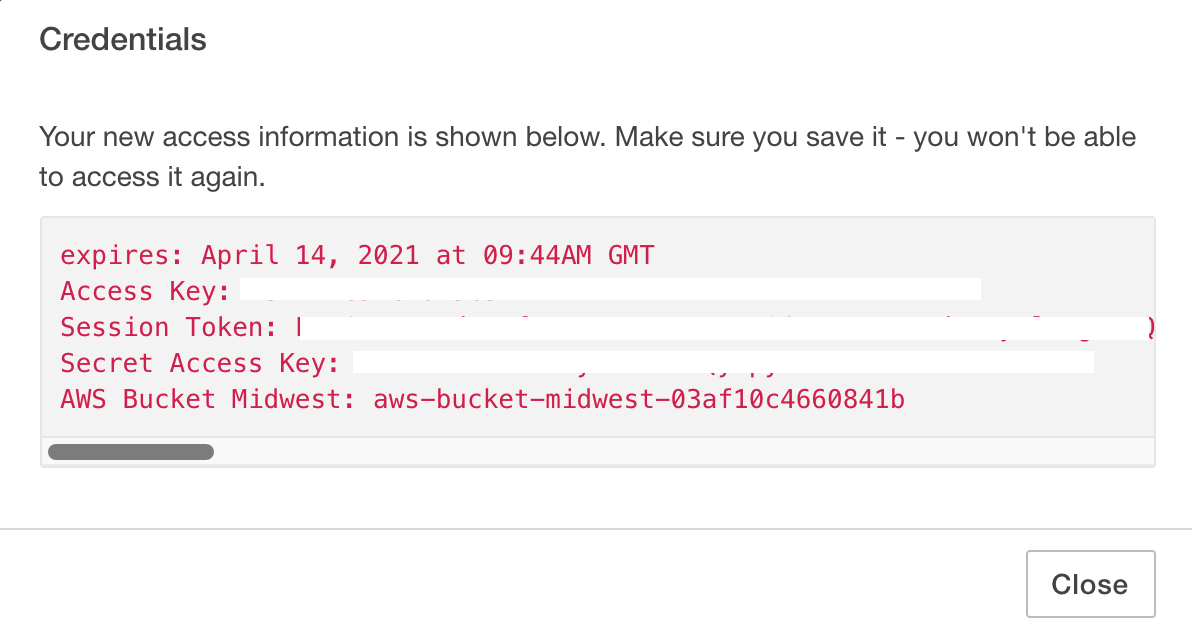
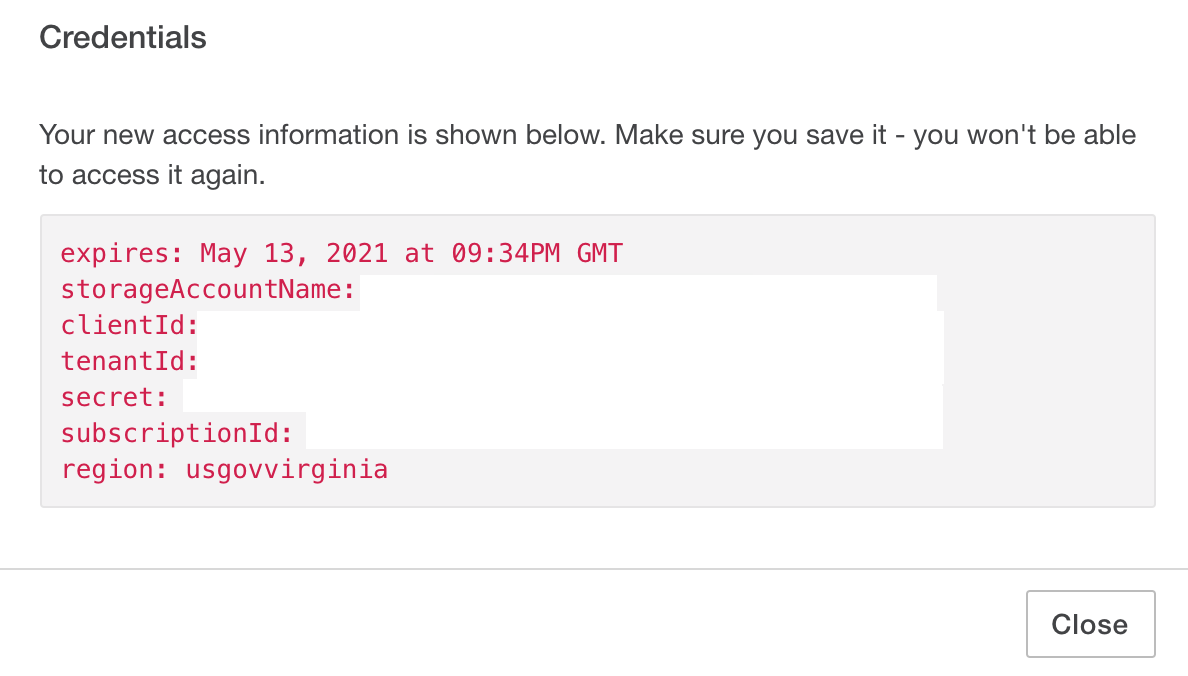
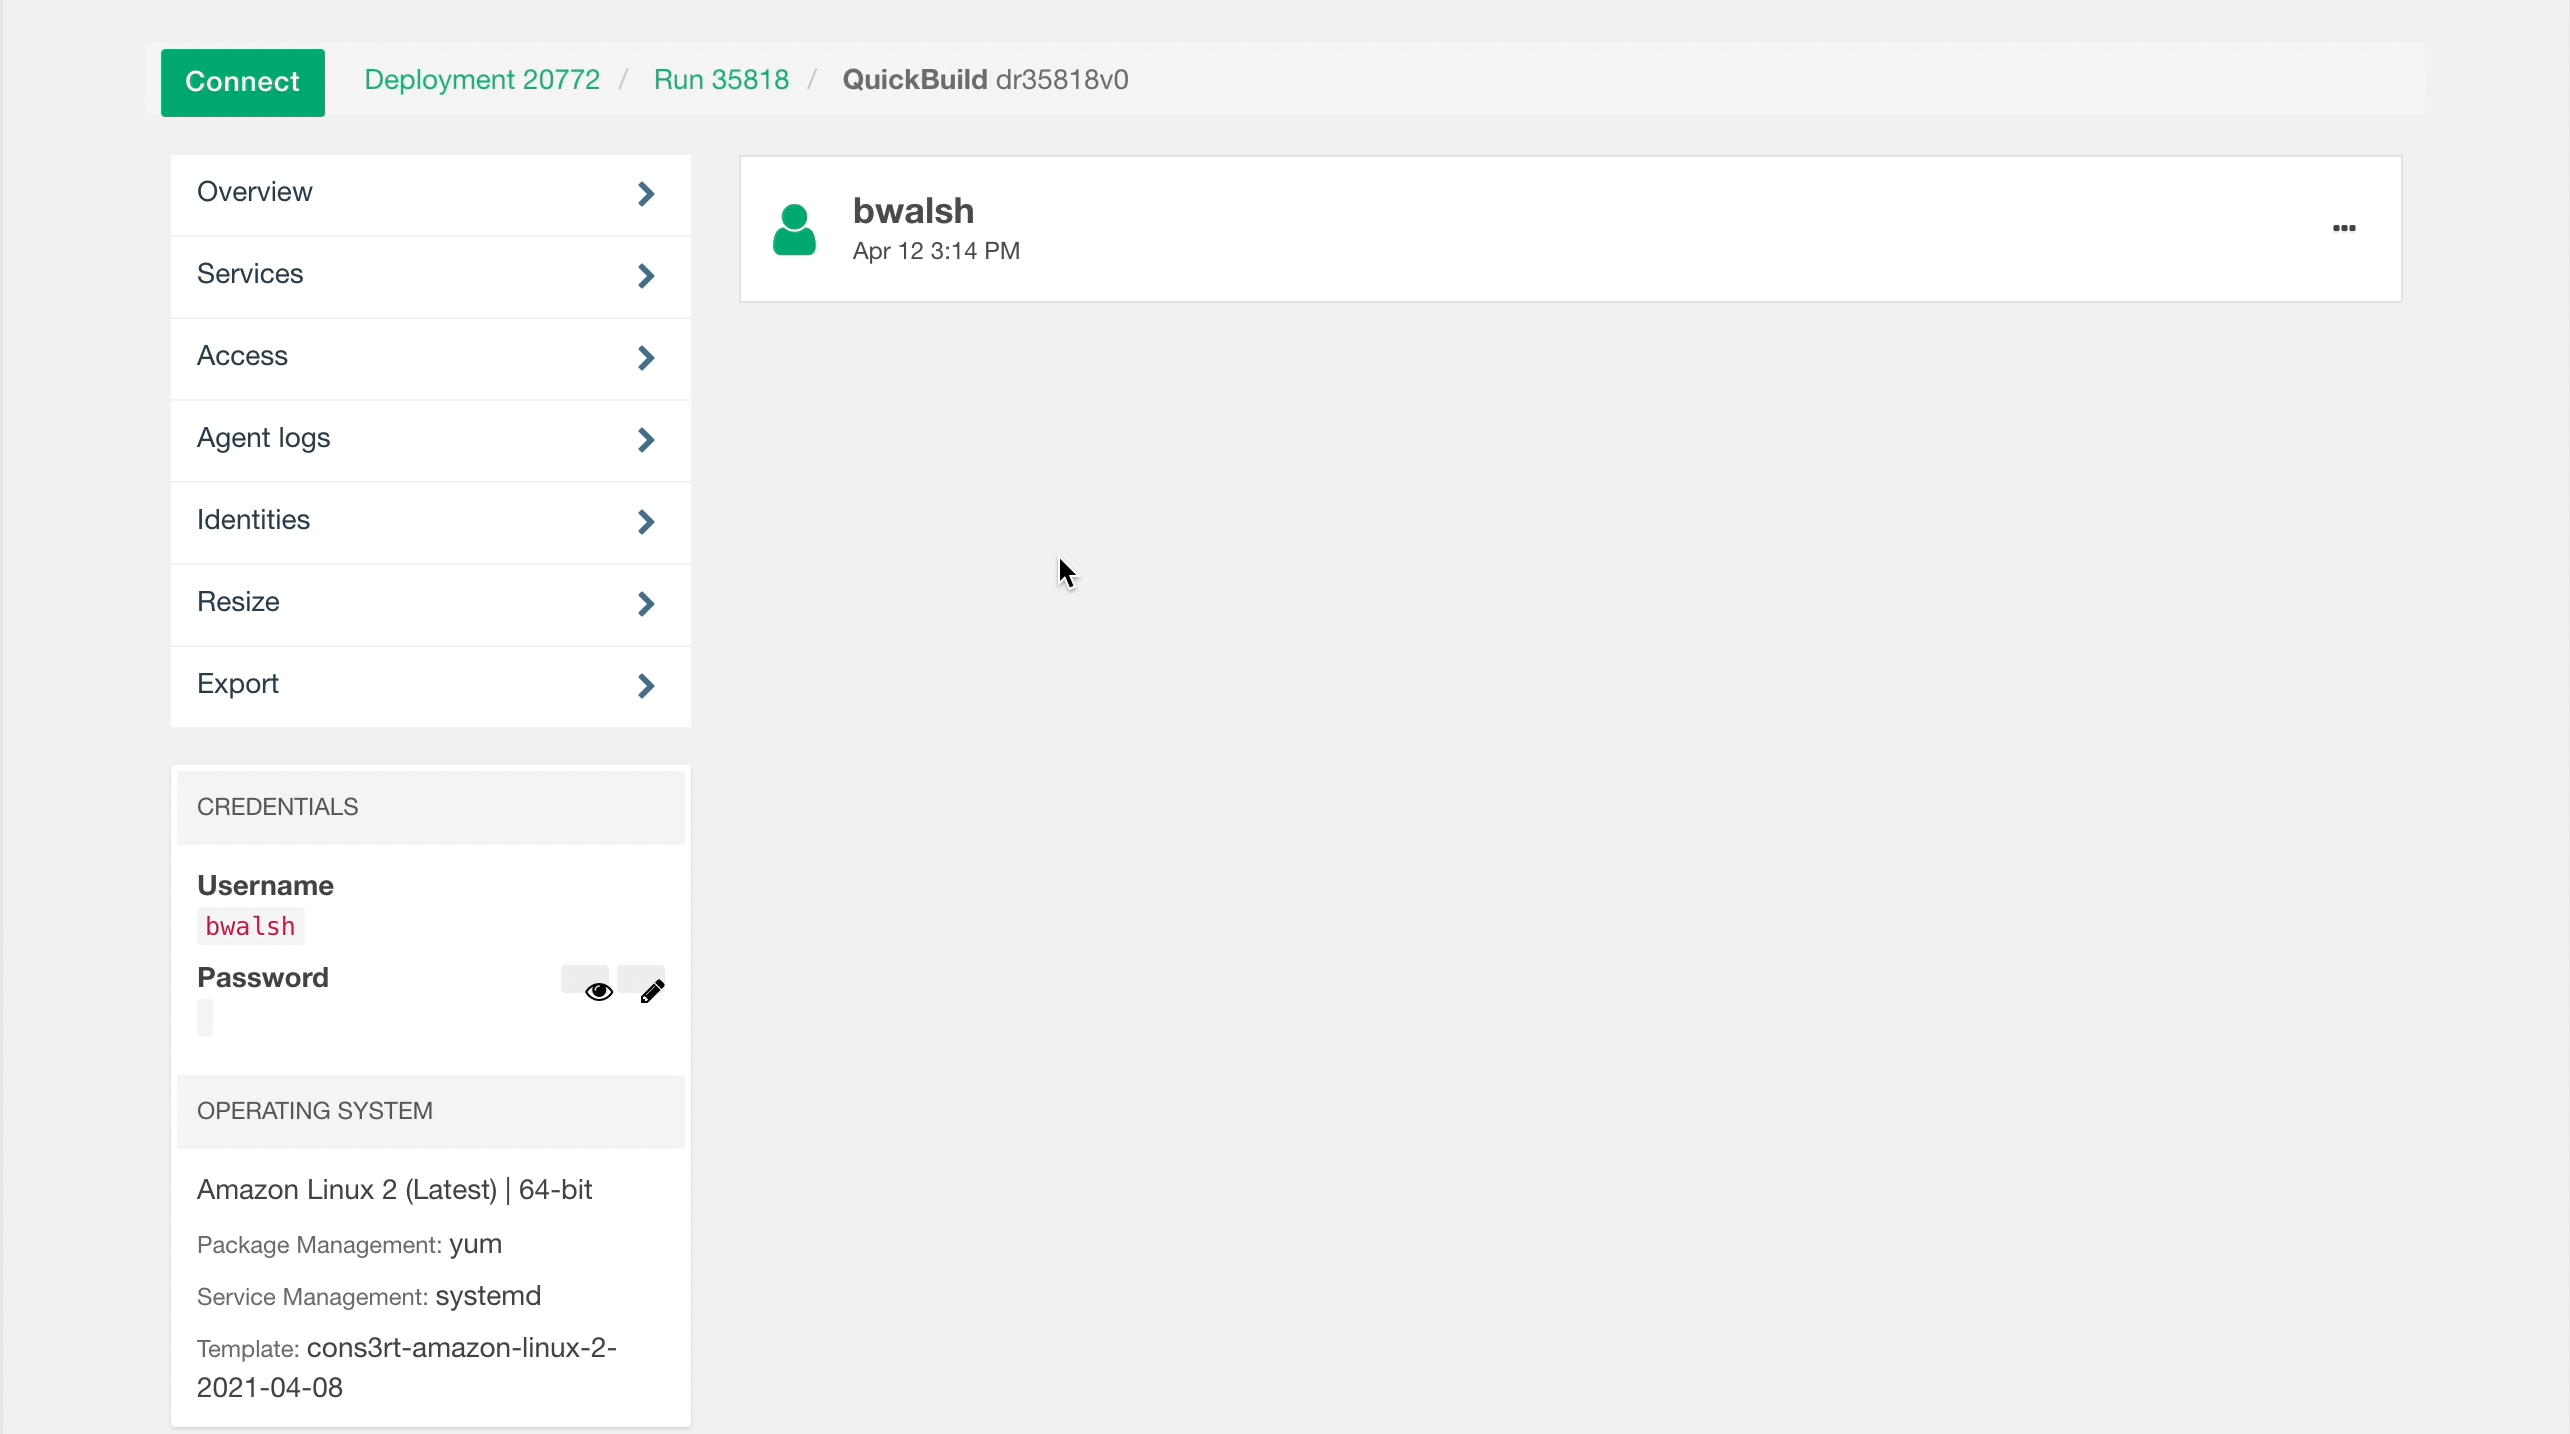
- Click Save, which will show the credentials:
Depending on the Cloudspace that the host is deployed from, the credentials presented will differ (see below):
AWS Credentials:
Azure Credentials:
See the examples below in “Using Storage Credentials” for more details on the credential types and use cases.
Note: These credentials will only be visible once, so copy and paste them somewhere safe. These credentials are not stored in any way by Arcus, and once the dialogue window is closed, there is no way to recover the credentials. If you misplace the credentials or accidentally close the window, your only recourse is to reissue the token.
Identities
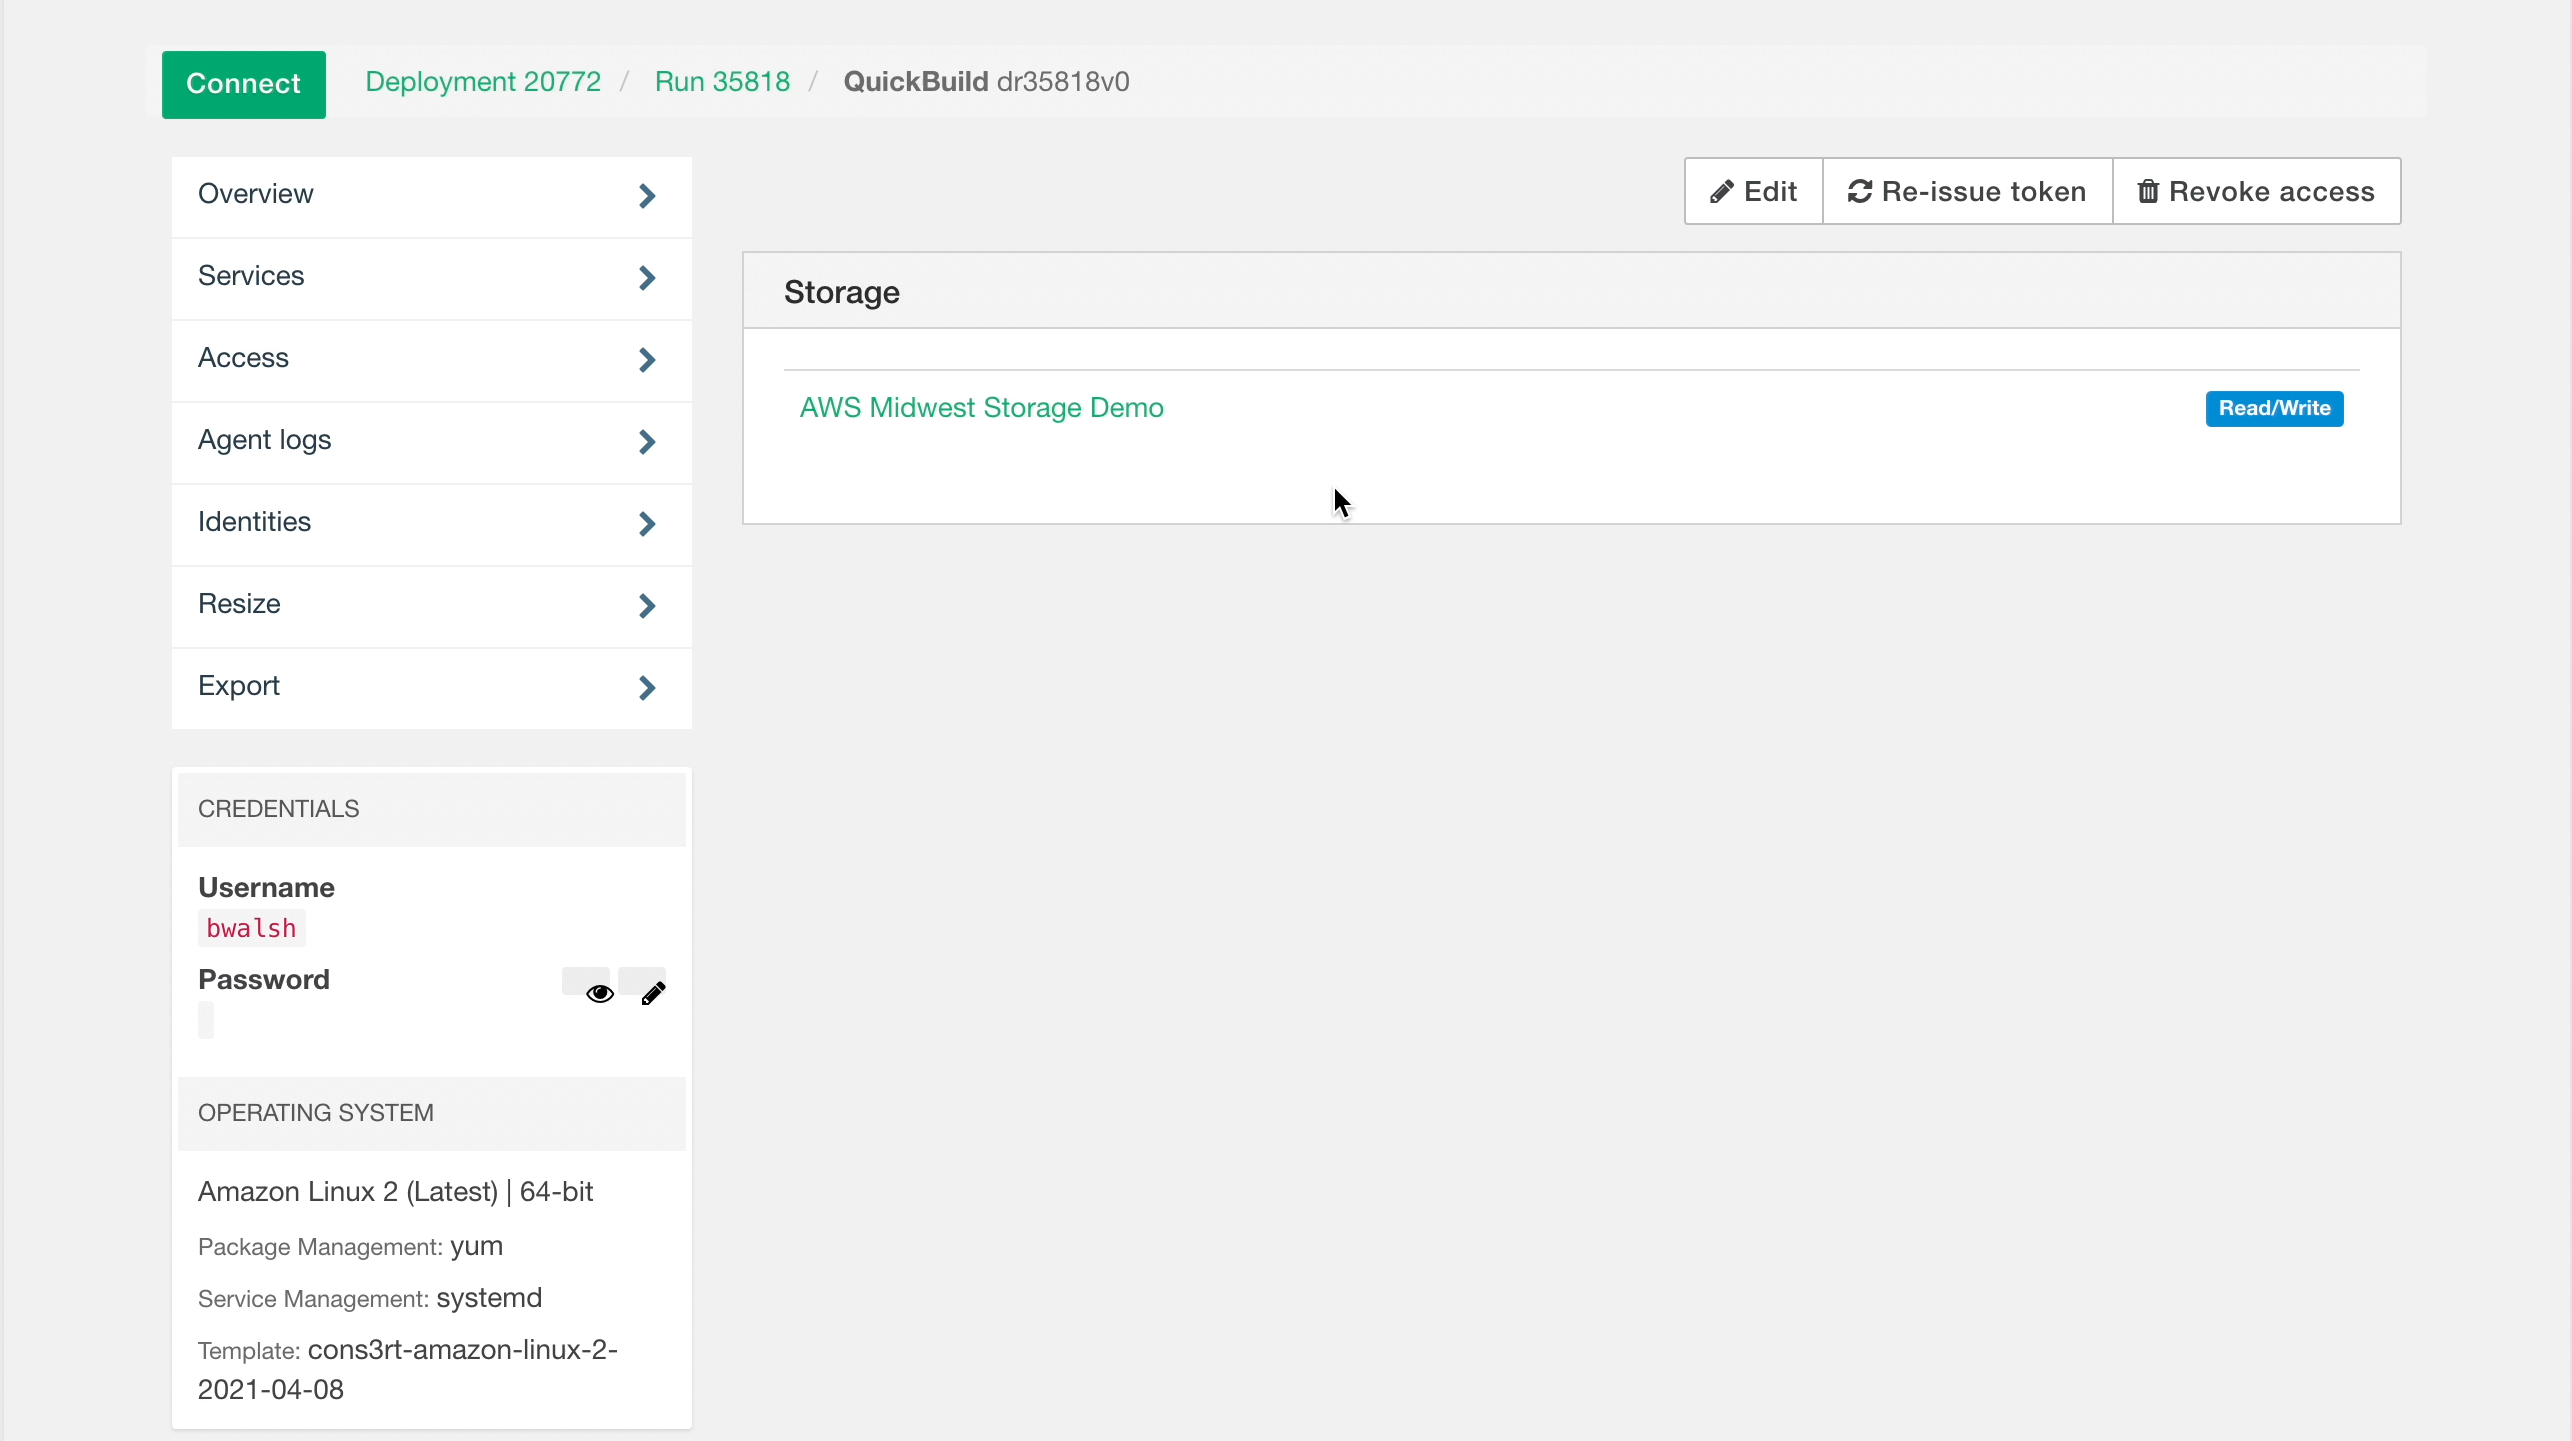
Adding a storage service to a virtual host and obtaining credentials creates an Identity. An Identity allows users to securely access the resources in a storage service from a specific virtual host. If you are the owner of the Deployment Run or a manager of the Deployment Run via the project or cloudspace that you manage, you can see and manage all of the identities associated with a given Deployment Run host. To manage the Identities associated with a virtual host, select the Identities section on the Host Options page.
Selecting a user’s Identity will show you which buckets they have access to, as well as what level of access they possess (Read, Read/Write, etc.). That said, you will not be able to see their credentials, and no user other than the one who created the credentials may reissue them. Moreover, Standard users may not view Identities, but may revoke or reissue their own.
Note: Once the credentials are presented, Arcus is no longer responsible for the storage, usage, and/or protection of the credentials provided. It is up to you to implement security best practices. For example, if you set up your credentials in an unprotected text file on a VM, anyone else with access to that machine could be able to view and use those credentials to access your storage.
Using Storage Service Credentials
With these credentials you can…
- List files in your storage services
- Download existing files from a storage service
- Upload new files to a storage service
To do so, you will need to plug your credentials into a number of third-party applications and services (e.g., AWS CLI, Azure CLI, Jupyter Notebooks, etc.). In order to access these third party apps and services, your VM needs to be routable to the internet.
Example 1: AWS CLI
For AWS, any third party application that supports STS token based connections will work.
- Launch a DR with an Amazon Linux virtual machine, or a Linux virtual machine that has the AWS CLI installed
- Generate credentials
- Connect to the virtual host via SSH
- Run
aws configureAWS Access Key ID [None]: your_access_key AWS Secret Access Key [None]: your_secret_access_key Default region name [None]: region_of_s3_bucket Default output format [None]: leave blank - Open
~/.aws/credentialsin the vi editor - Add the line
aws_session_token = your_session_token - Save and quit (
esc, then:wq) - List the contents of the S3 Bucket:
aws s3 ls s3://bucket-name-identifier - Download file:
aws s3 cp s3://bucket-name-identifier/filename filename_download - Upload file:
aws s3 cp filename s3://bucket-name-identifier/filename_upload
Note: Credentials issued for virtual hosts in AWS only last for, at most, 12 hours.
Example 2: Azure CLI
For Azure, any third party that supports service principal based authentication will work.
- Deploy a virtual machine and install Azure CLI
- Generate an identity on the deployment run host to connect to a storage bucket
- Log in to the VM and open a terminal with Azure CLI
- Log in with the provided identity, and use the Azure CLI as shown in the examples below:
- For Azure Government only, set the environment
az cloud set --name AzureUSGovernment
- Log in, and replace the USERNAME, PASSWORD, and TENANT with the values provided with your identity
az login --service-principal --username '<USERNAME>' --password '<PASSWORD>' --tenant '<TENANT>'
-
For the examples below, replace ACCOUNT_NAME and CONTAINER_NAME with the values provided with your identity
-
List contents of BLOB Store:
az storage blob list --account-name <ACCOUNT_NAME> --container-name <CONTAINER_NAME> --auth-mode login
- Upload file:
az storage blob upload --file "C:\Path\To\filename.txt" --account-name <ACCOUNT_NAME> --container-name <CONTAINER_NAME> --auth-mode login
- Download file:
az storage blob download --name filename.txt --file "C:\Path\To\filename.txt" --account-name <ACCOUNT_NAME> --container-name <CONTAINER_NAME> --auth-mode login
- Upload a directory:
az storage blob upload-batch --source "C:\Path\To\Directory" --account-name <ACCOUNT_NAME> --destination <CONTAINER_NAME> --auth-mode login --destination-path "/Destination/Path"
- Download a directory:
az storage blob download-batch --source "/Source/Path" --account-name <ACCOUNT_NAME> --auth-mode login --destination-path "/C:\Path\To\Directory"
Note: Credentials issued for virtual hosts in Azure only last for, at most, 30 days.
More Help
See these processes in action with our video tutorials: