Express User Interface
Topic:
Express User Interface
The Express User Interface
What is the Express User Interface? The Express User Interface (EUI) is a way to access, deploy and undeploy selected deployments in a simplified tiled view without other distracting elements. This Express User Interface is specially designed for users that only need to consume resources or workstations, not create or modify. Users accessing the Express User Interface will utilize published Runs and Scenarios that have published as Compositions (see KB article here). For more information on managing the Express User Interface, please see this KB article.
Note: Express Users are dependent on published Compositions made available to them by other project members with elevated permissions. Express Users entering a project with no published Composition will be greeted with a blank screen with no “tiles” until a Composition has been published that they can access. Please ensure that Compositions have been published in the relevant project to avoid potential confusion.
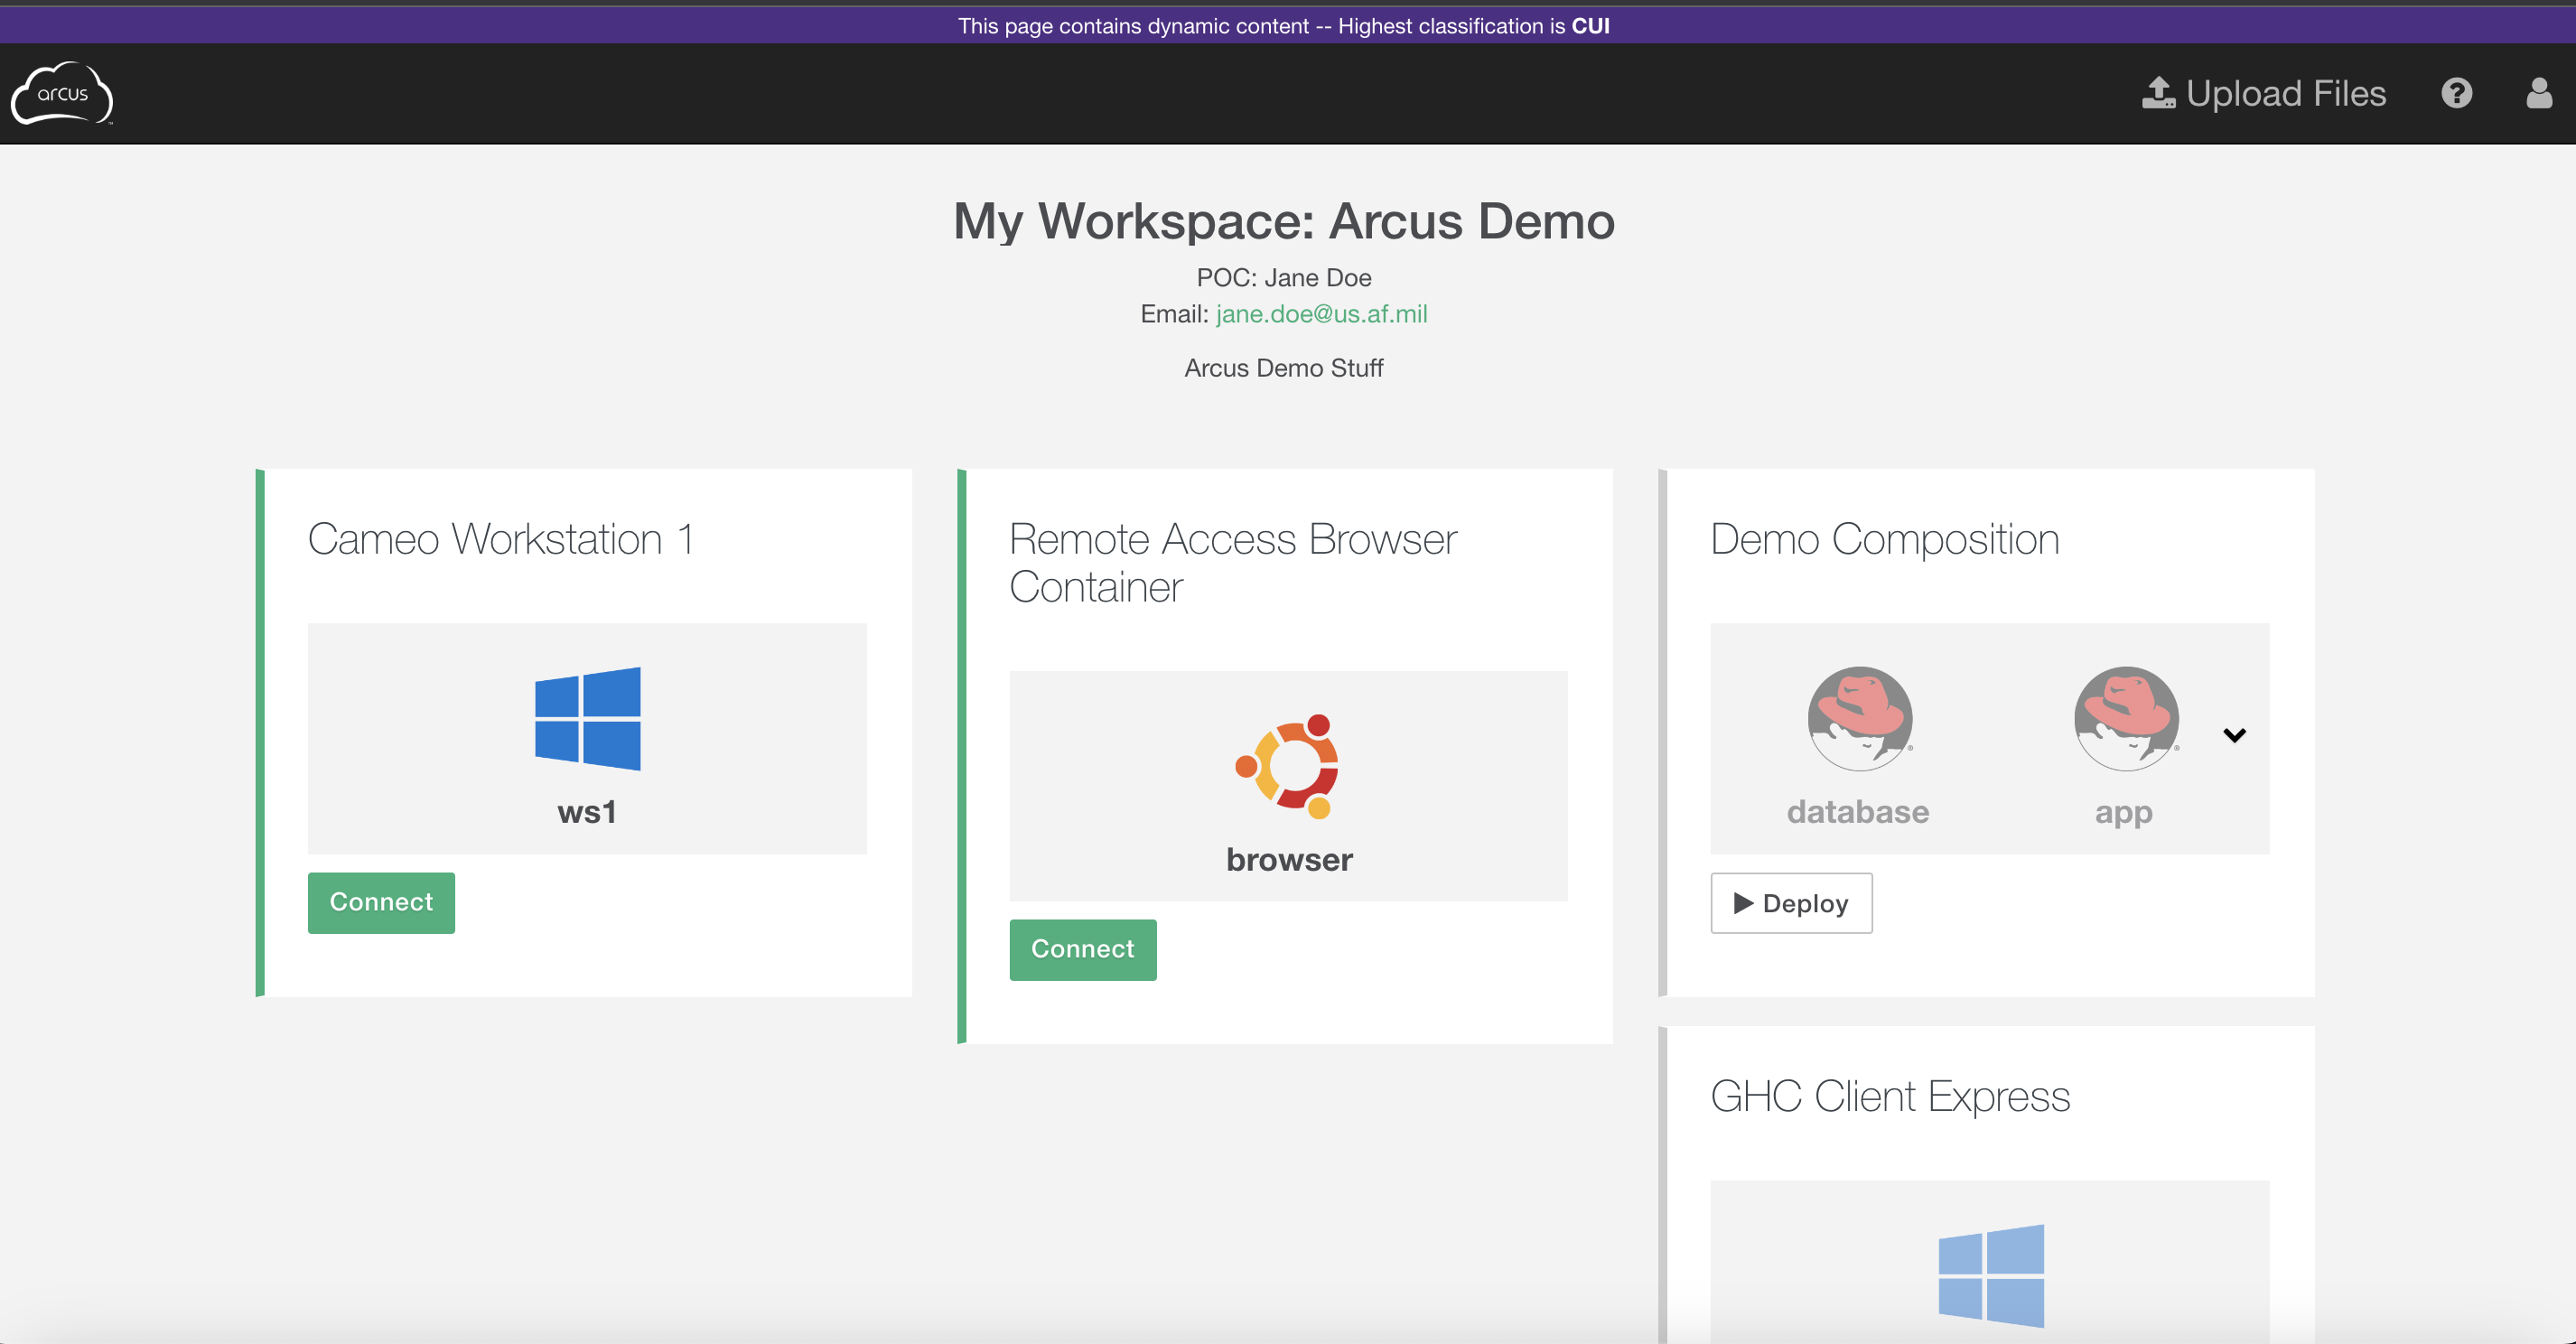
Navigating the Express User Interface
The Express User Interface, as depicted below, is simplified compared to the ordinary Arcus interface and consists of individual “tiles” that present published Compositions that can have one of three actions performed on them.
- Deploy the Composition
- Undeploy the Composition
- Connect to Deployed Host(s)
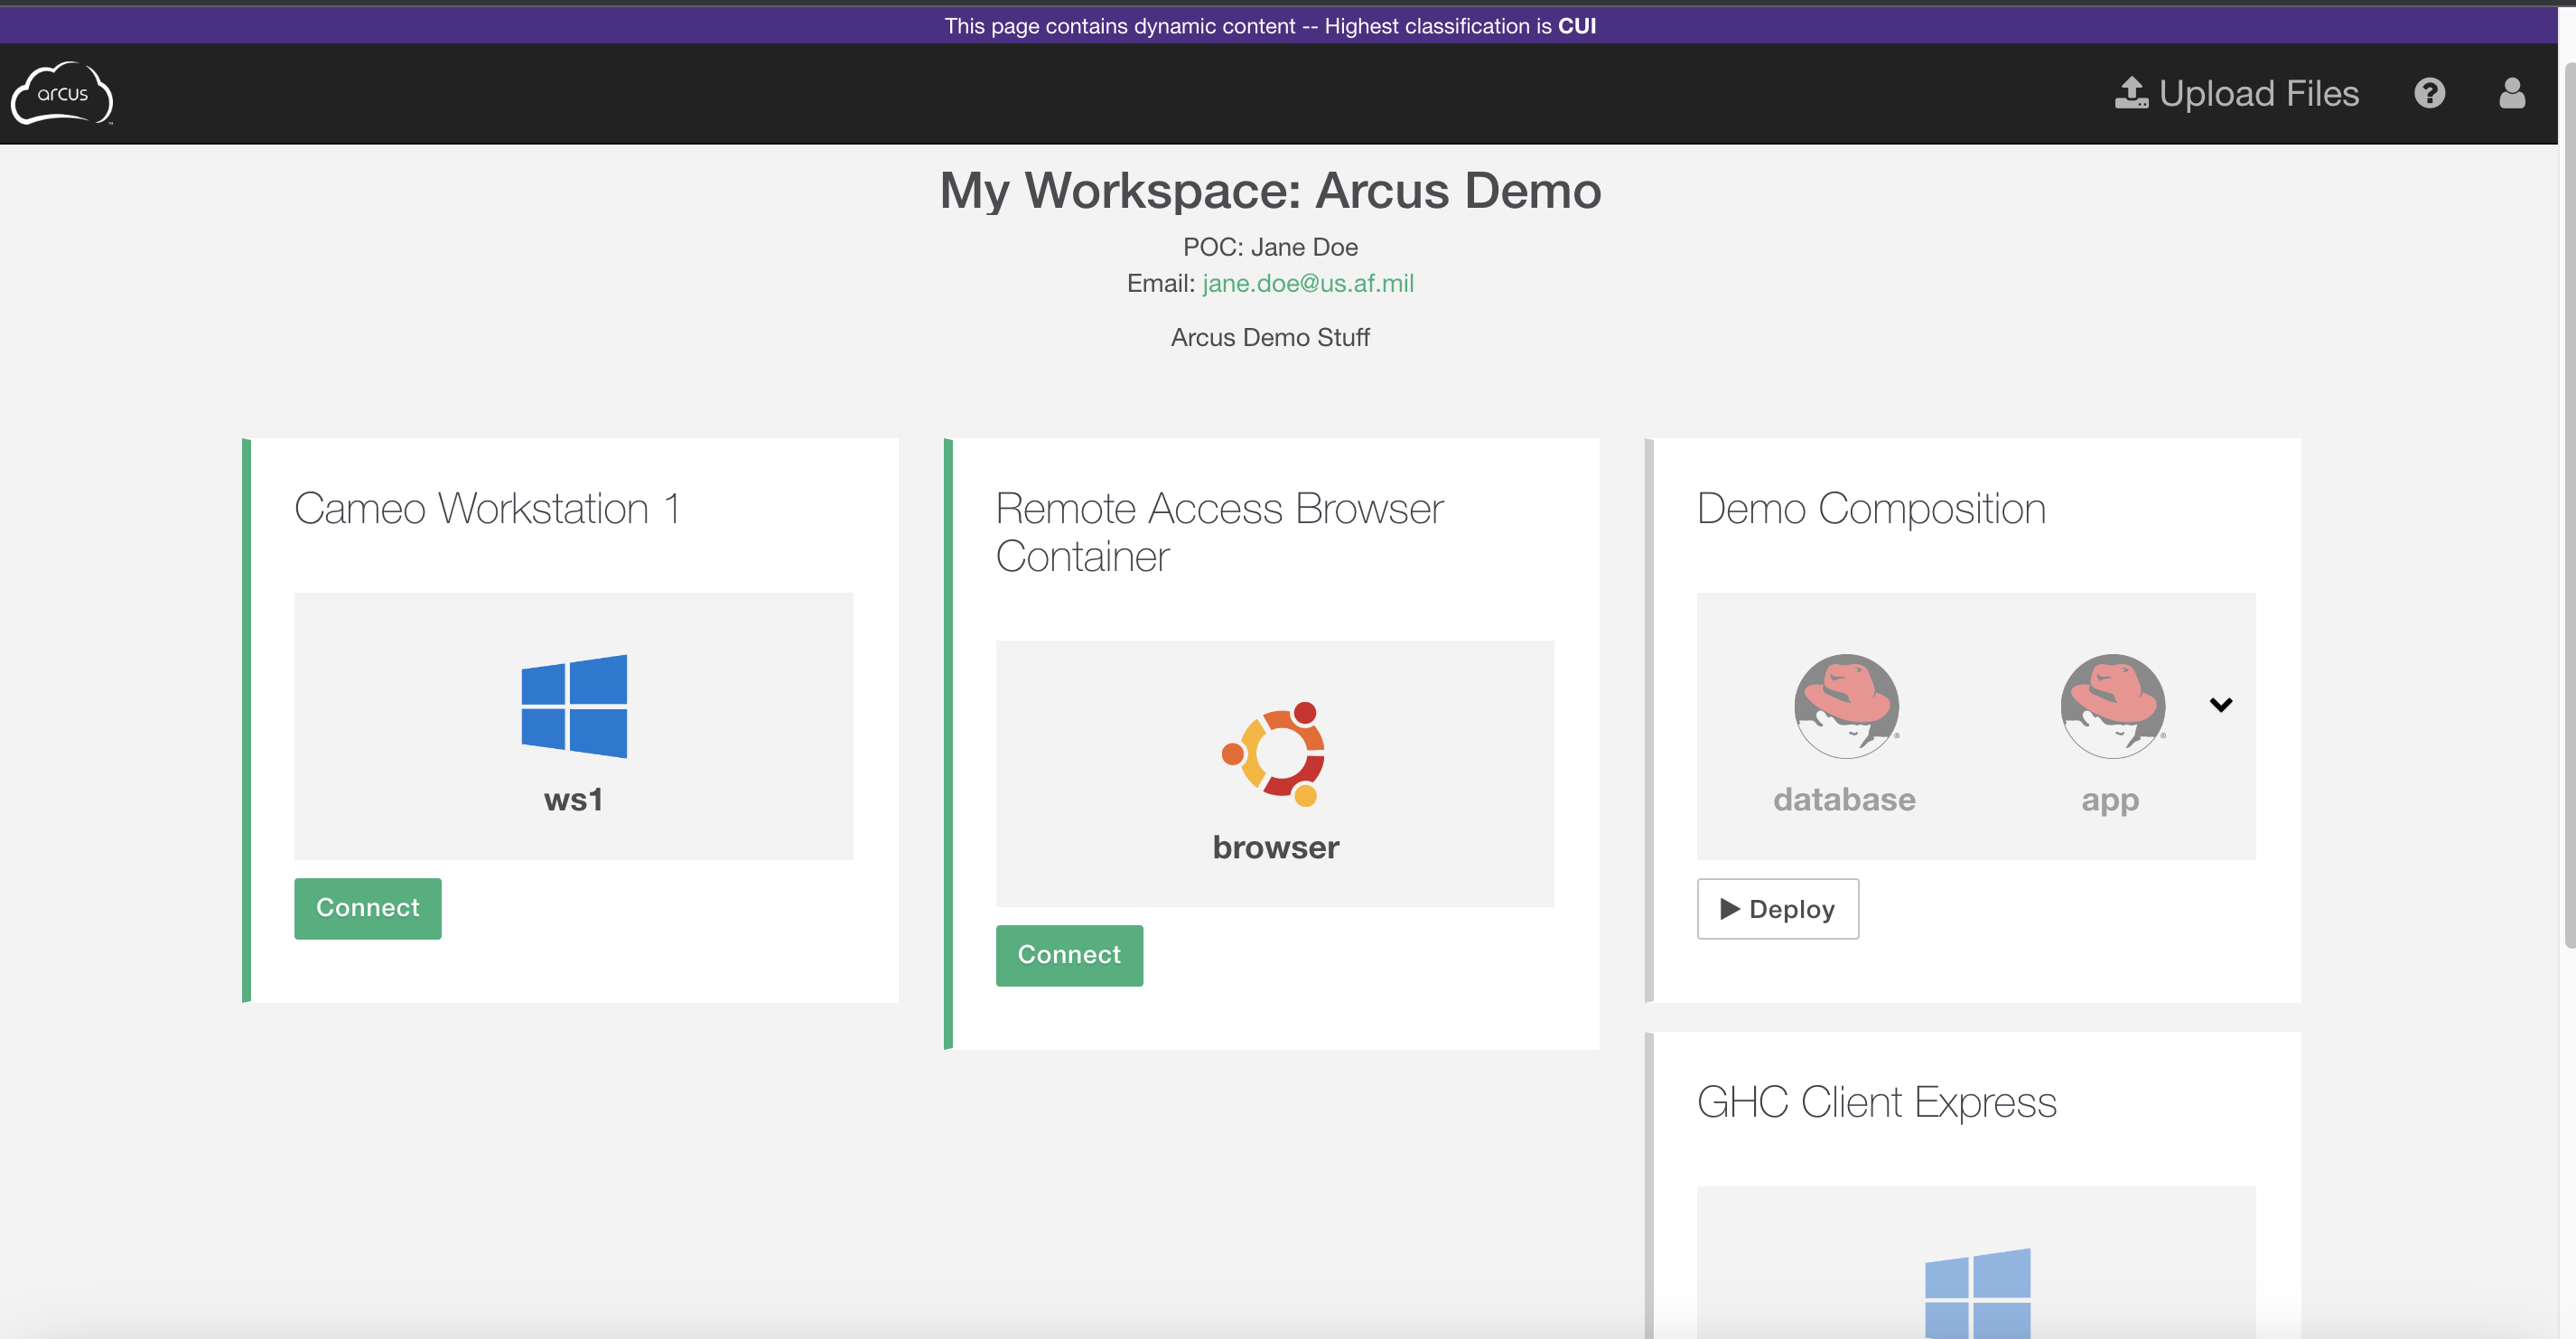
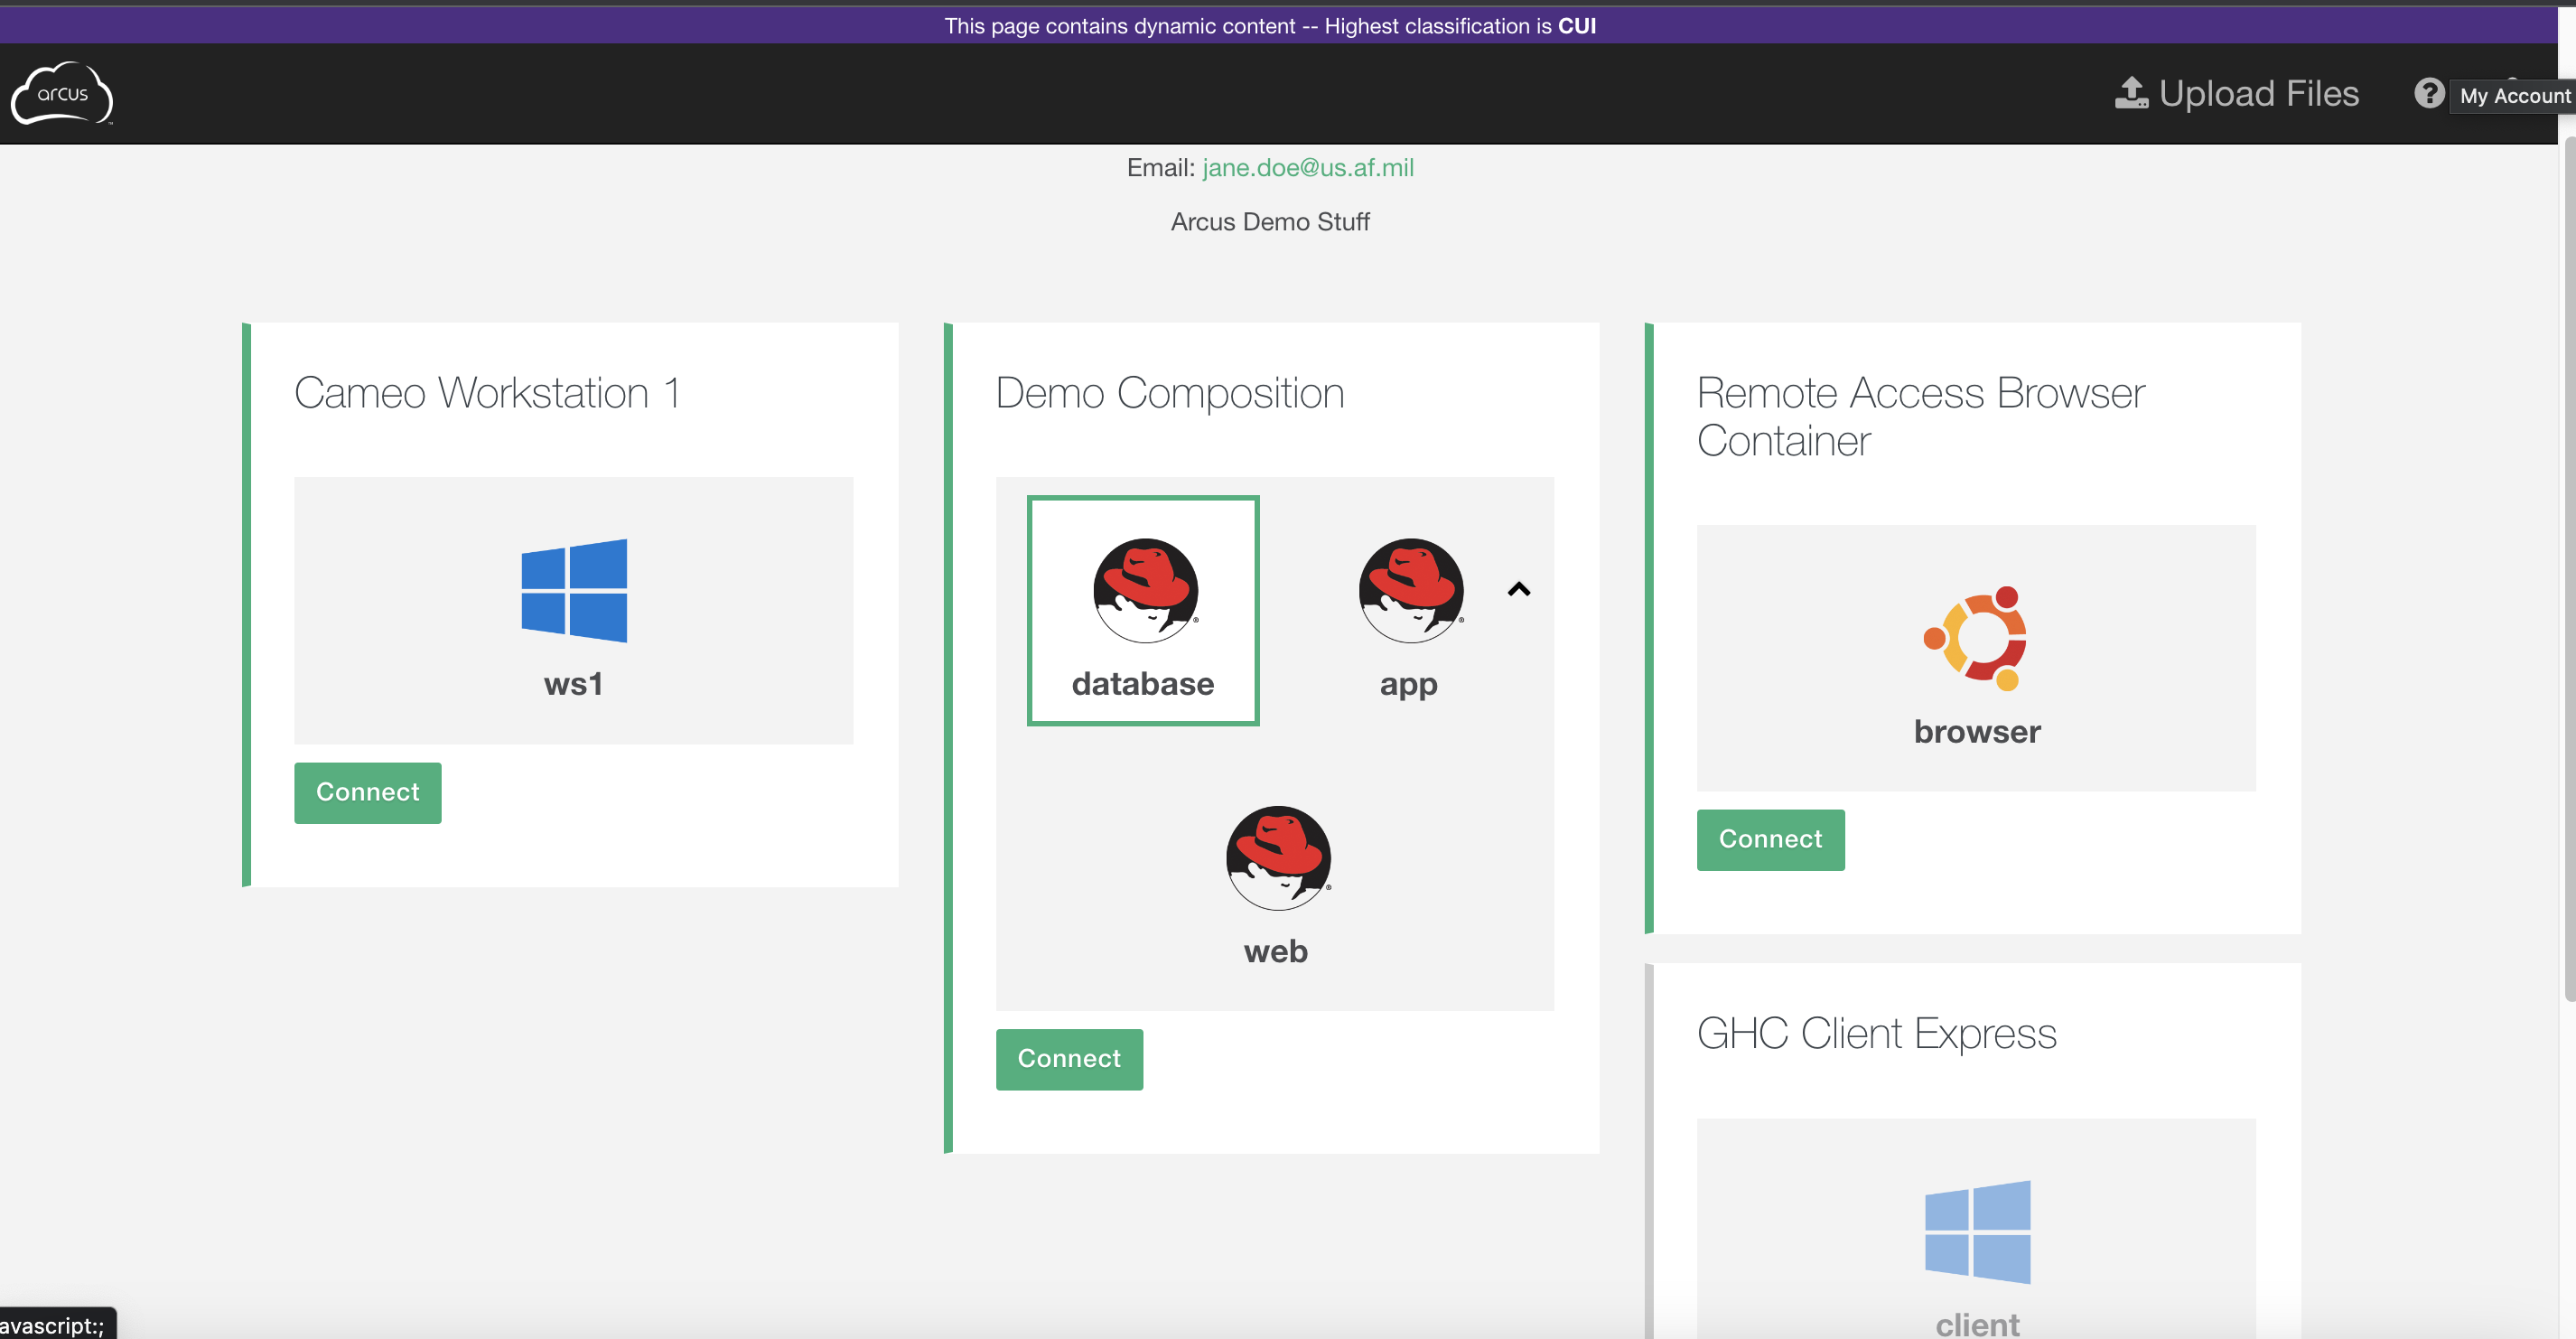
Each tile displays the name of the Composition, the type of host(s), a connection button for any available hosts, and the Deploy/Undeploy button. If a Composition tile has more than two available hosts, there is a selectable dropdown caret on the right side of the tile that will expose the additional hosts when clicked.
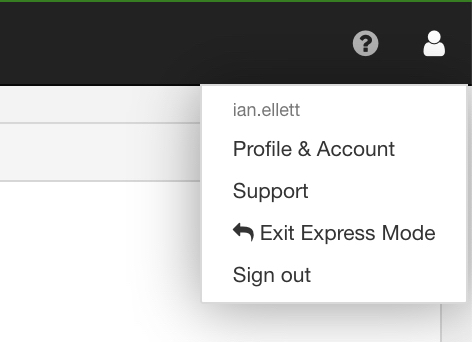
In the upper right of the Express User Interface there is a profile icon. Clicking this will give Express users access to their settings via a dropdown with three possible selections:
- Profile and Account
- Support
- Sign Out
Clicking the “Profile and Account” screen will allow users to edit their username, first/last name, email address, and phone number. Clicking “Save Profile” will save any changes made to these fields.
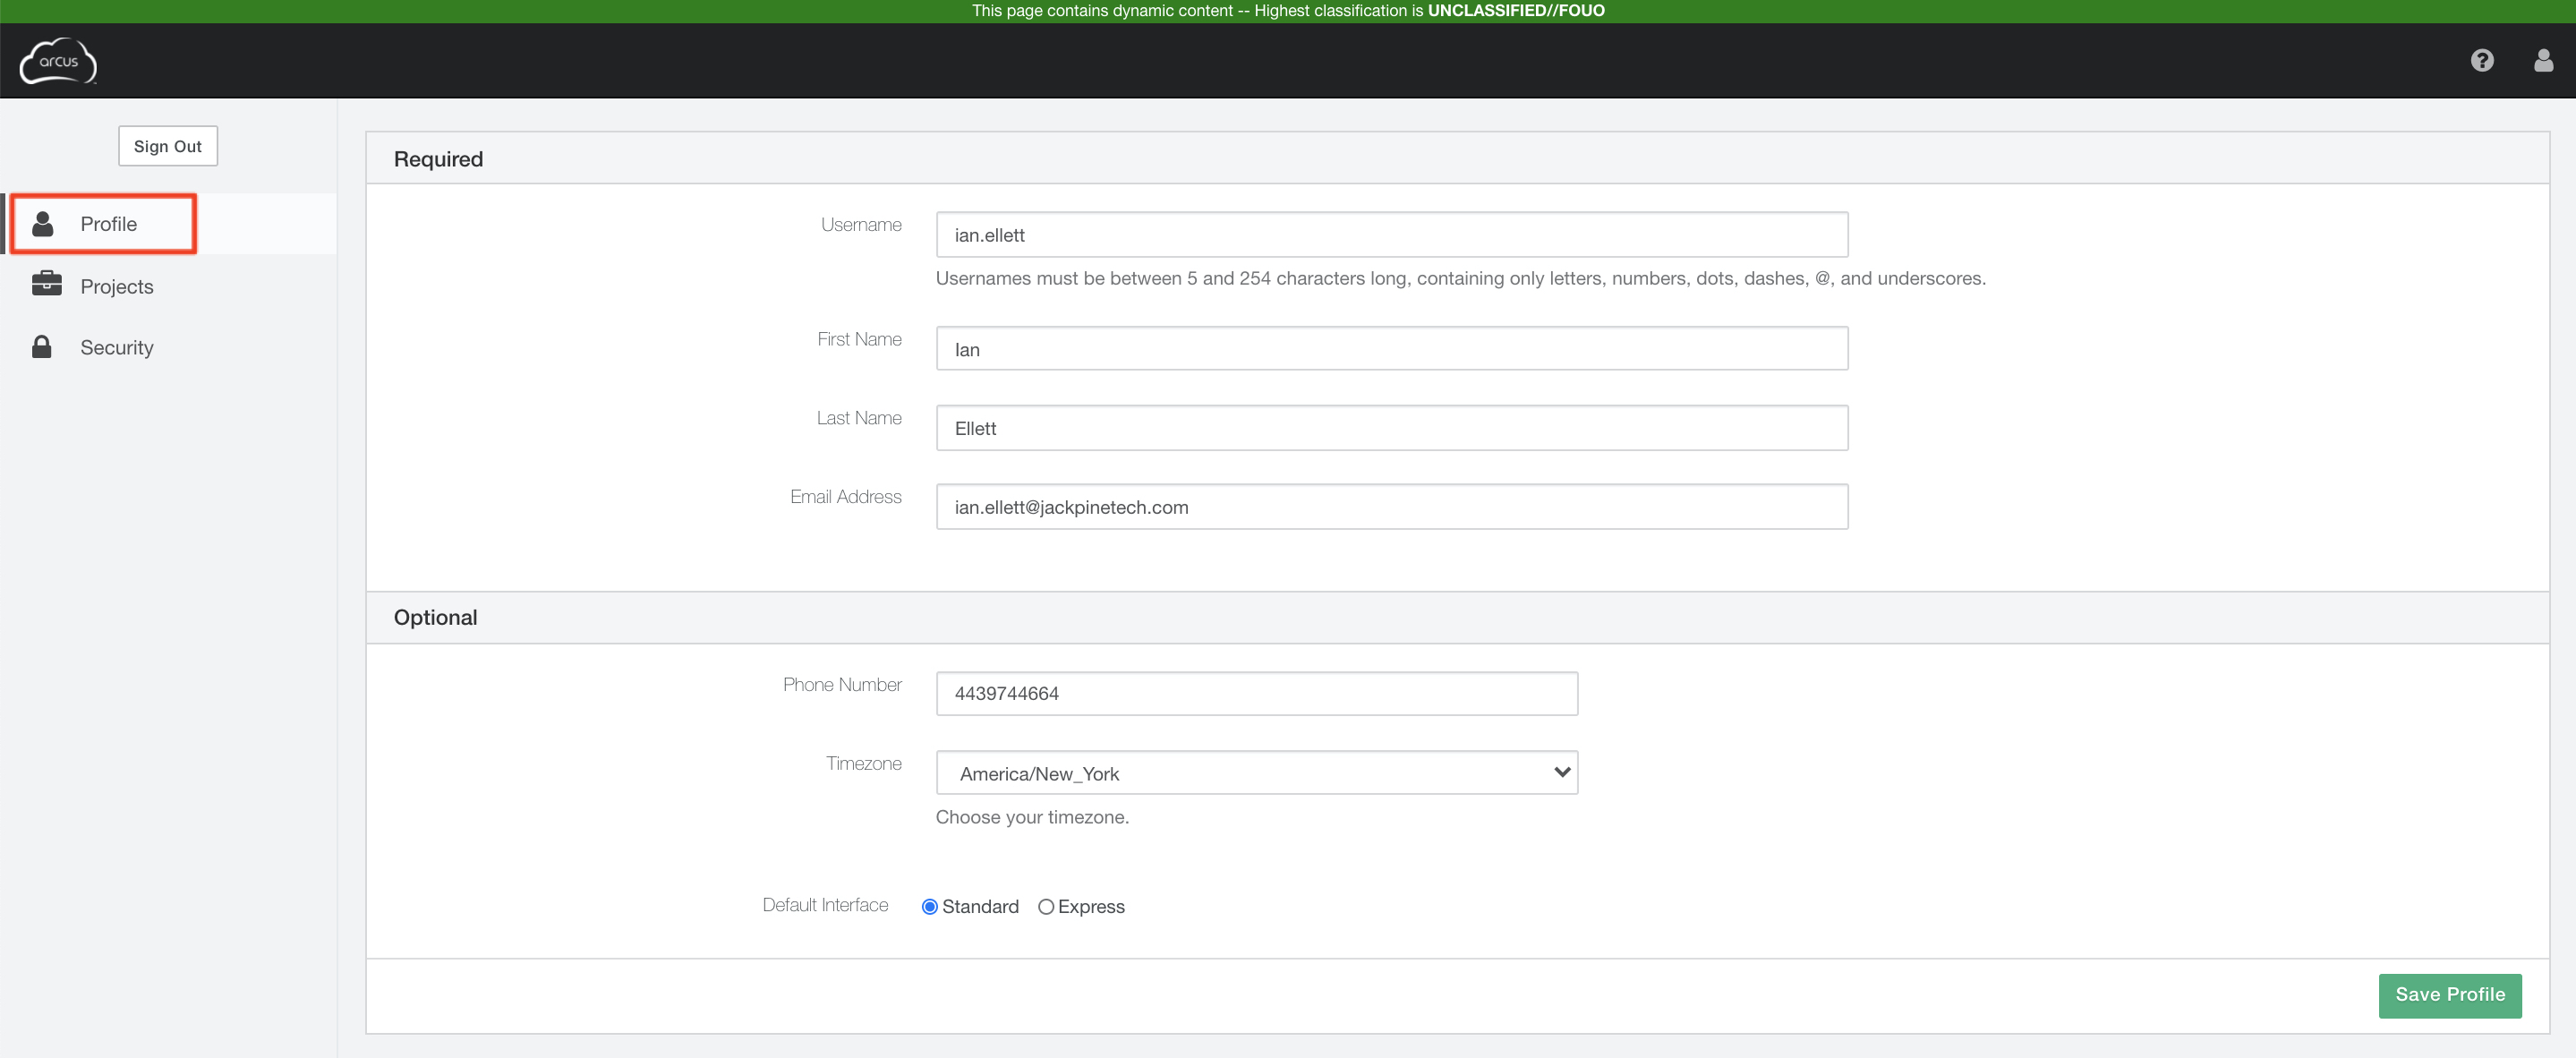
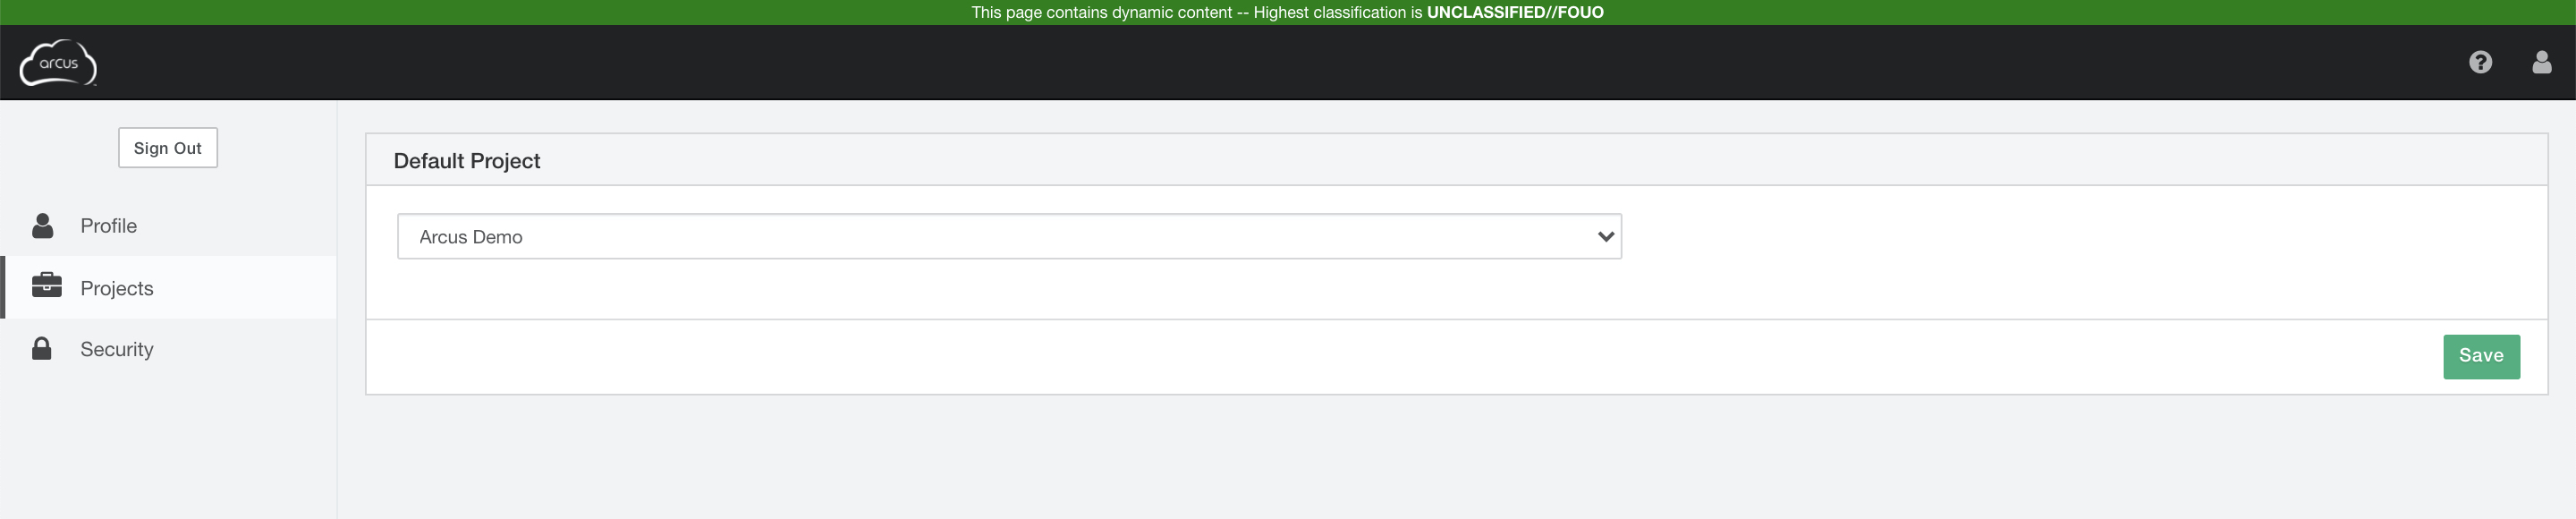
Clicking the “Projects” screen will allow users to edit their default project. If you have access to multiple projects, you can selece the “default” project that will be displayed when you log into Arcus. Clicking the “Save” button, will save any changes to your default project.
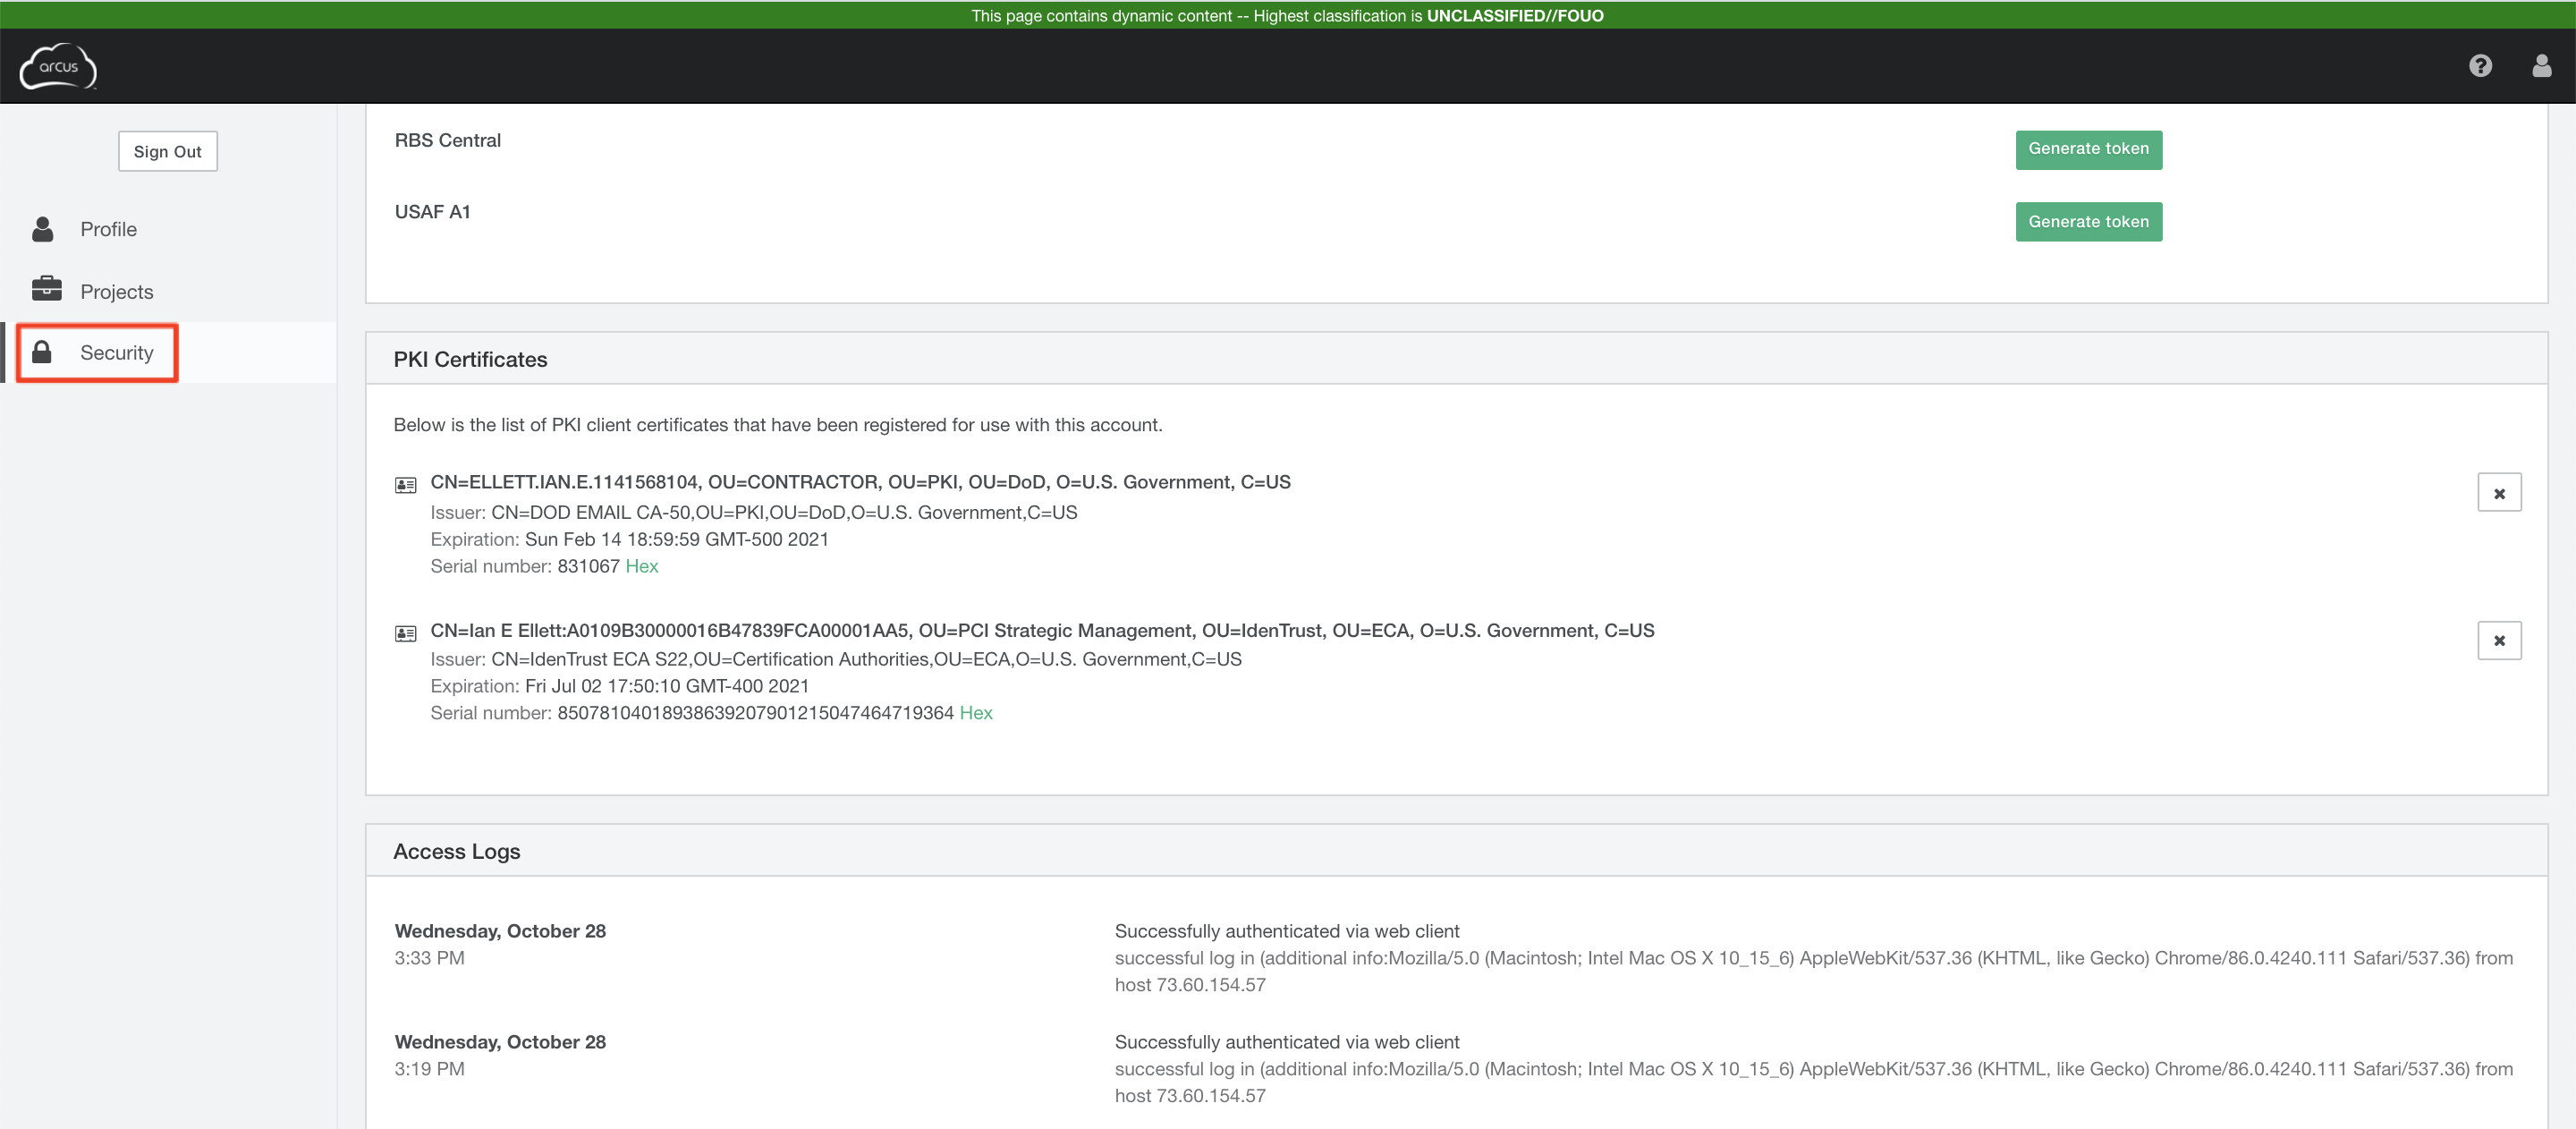
Clicking the “Security” screen will allow users to generate API tokens, examine details of their registered PKI certificates, and any relevant access logs.
Clicking the second “Support” option in the settings dropdown will take users directly to the support page, with more information on API documentation, Knowledge Base articles, getting started videos, training information, and other helpful information for getting started.
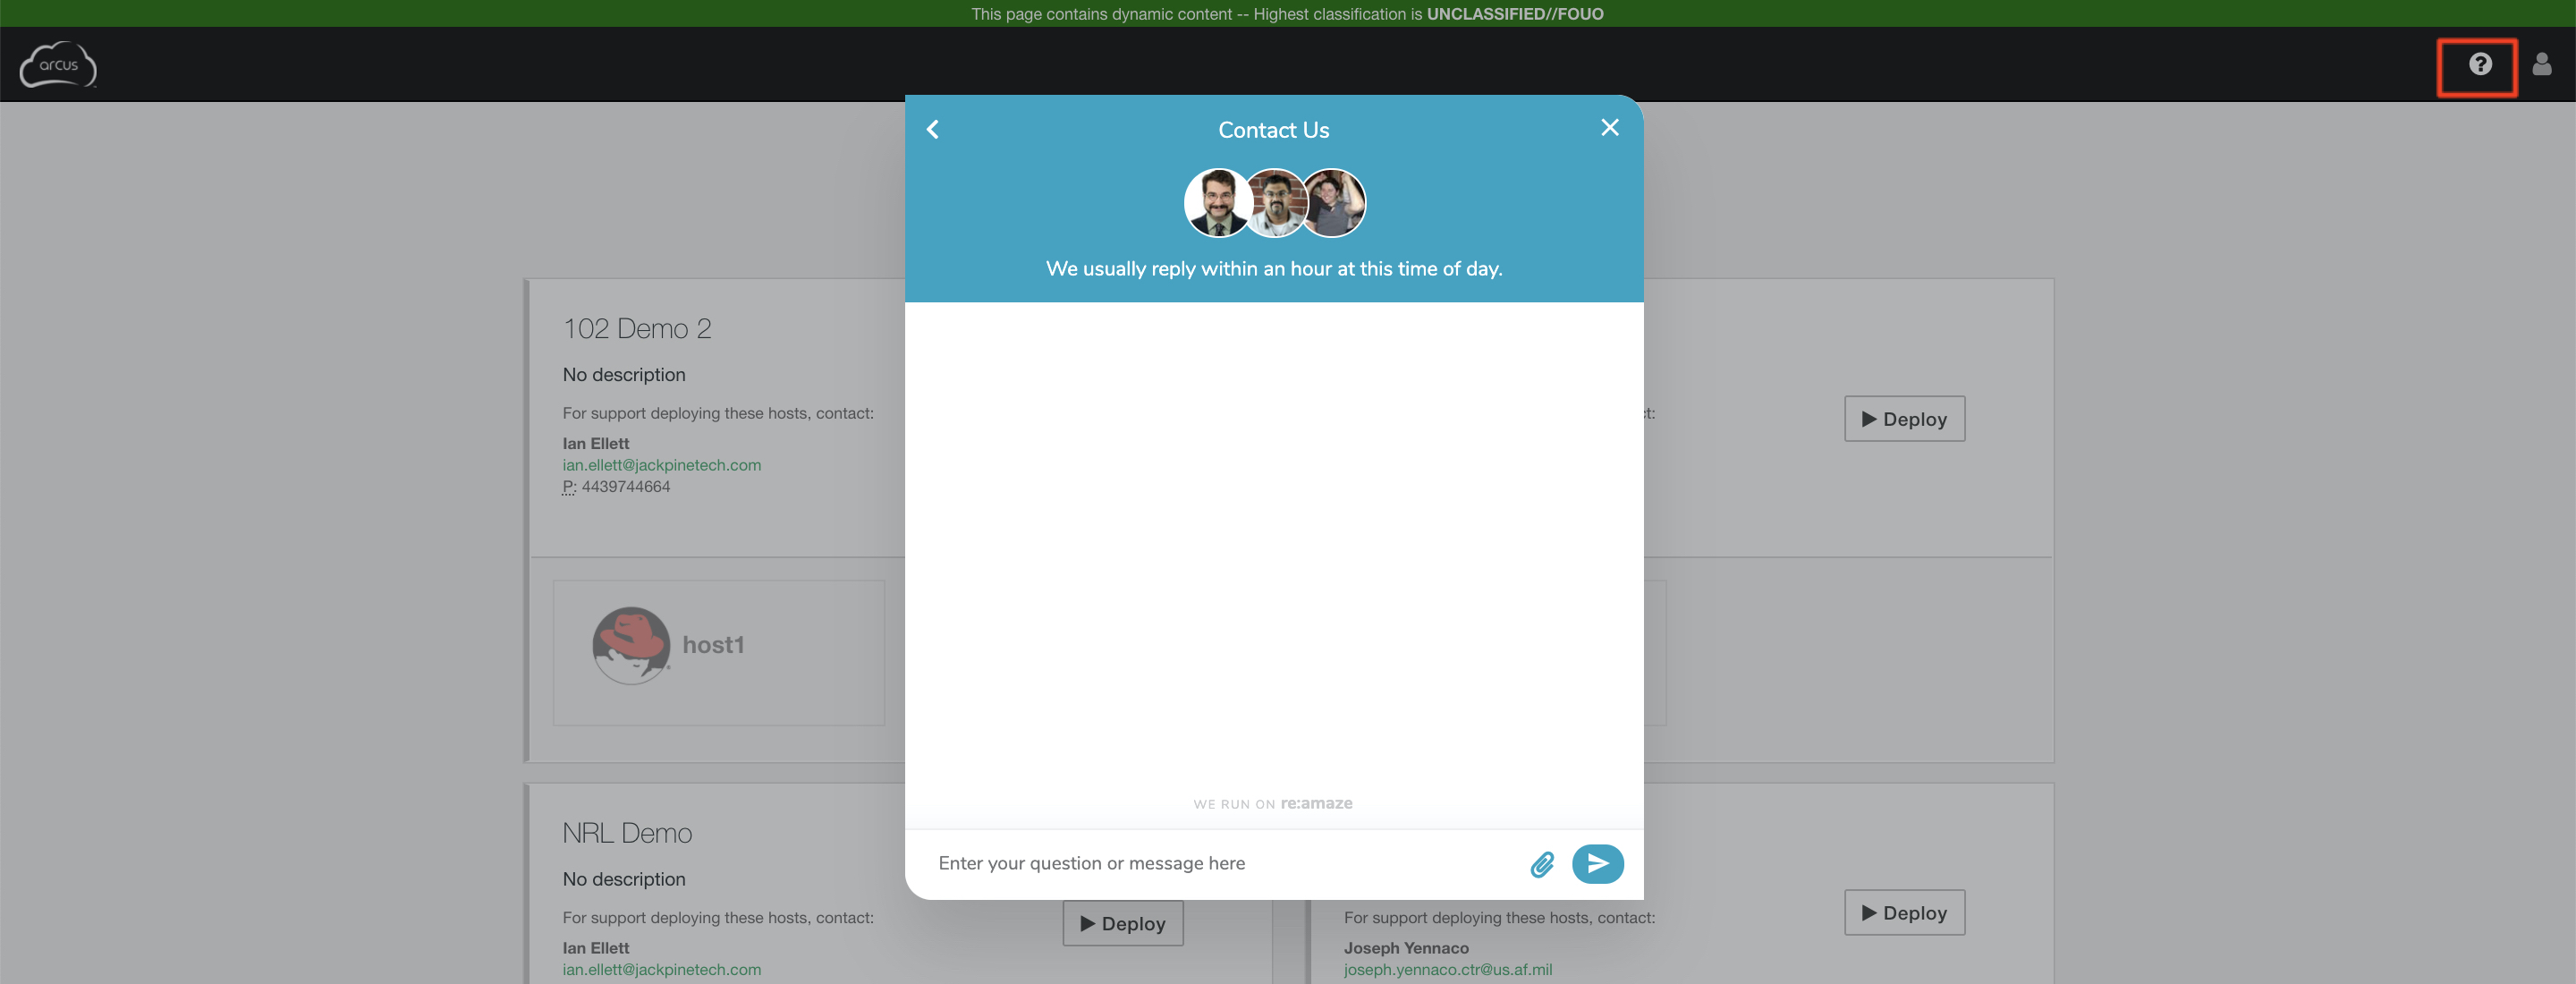
Also, in the upper right of the Express User Interface there is a circular “question mark” icon. Clicking this will display Knowledge Base articles and can be searched using keywords by clicking in the search bar at the top of the interface. It also has a button at the bottom to “Contact Us” and ask questions directly to support without having to send an email. Additional information on support in Arcus can be found here.
Clicking on the final “Sign Out” option in the setting menu will prompt the user to sign out of their active session.
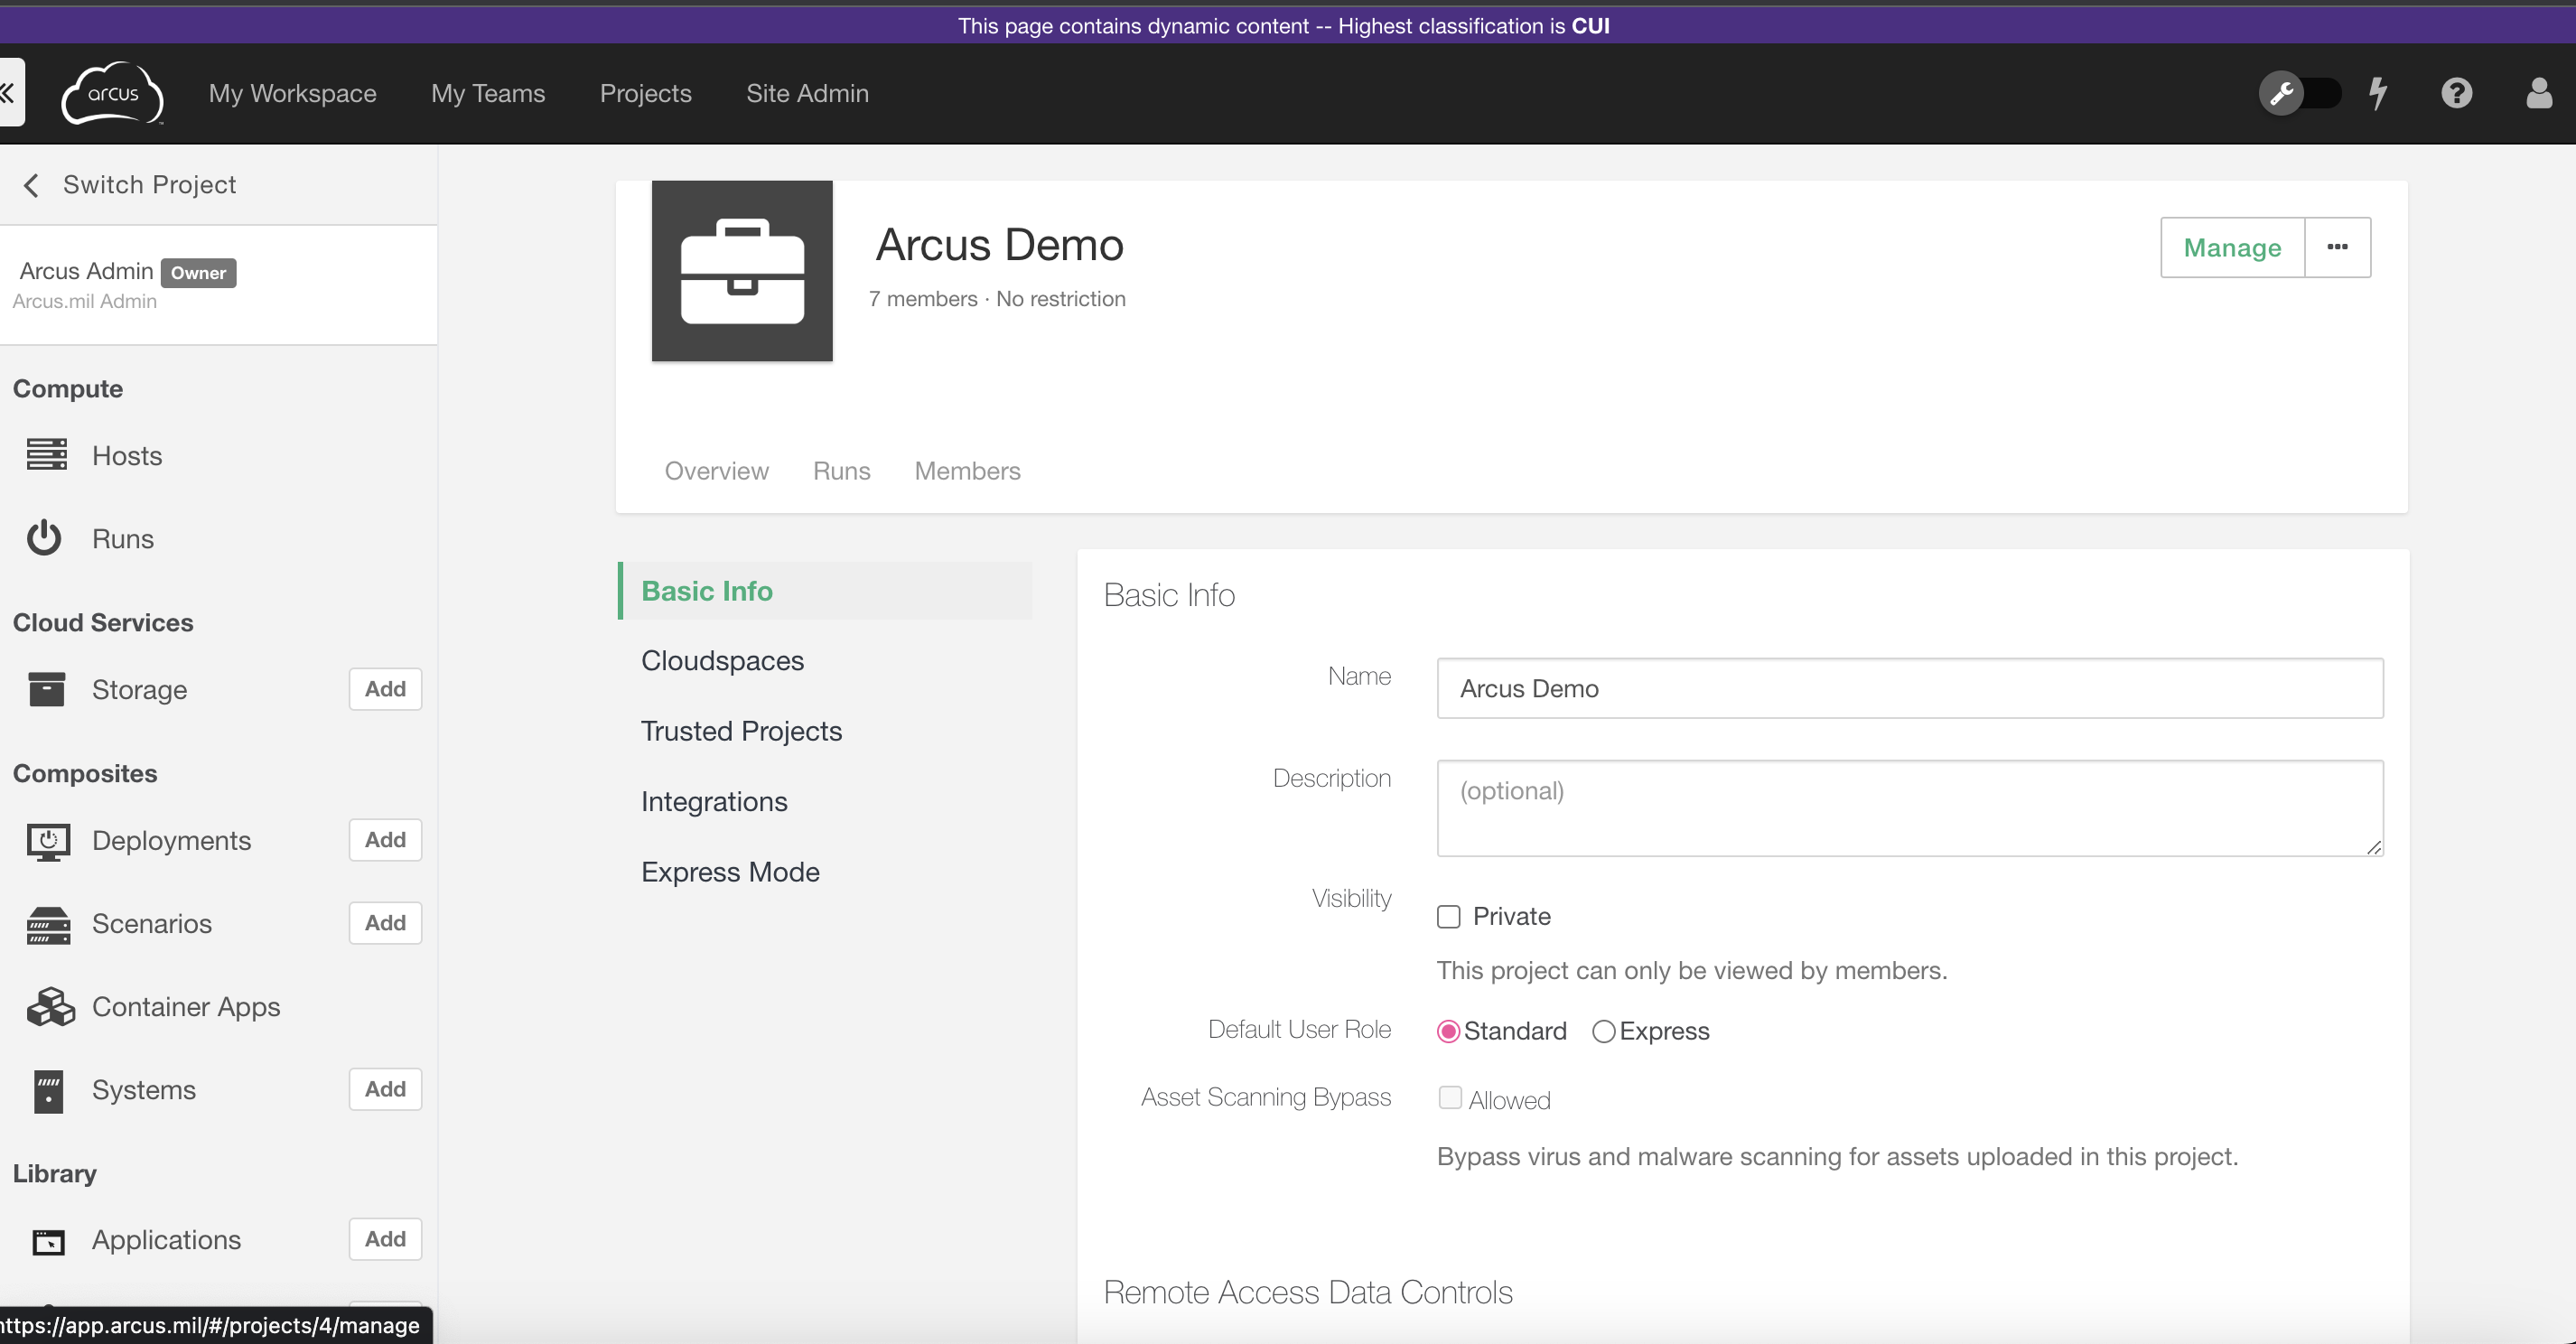
Adding Contact Information
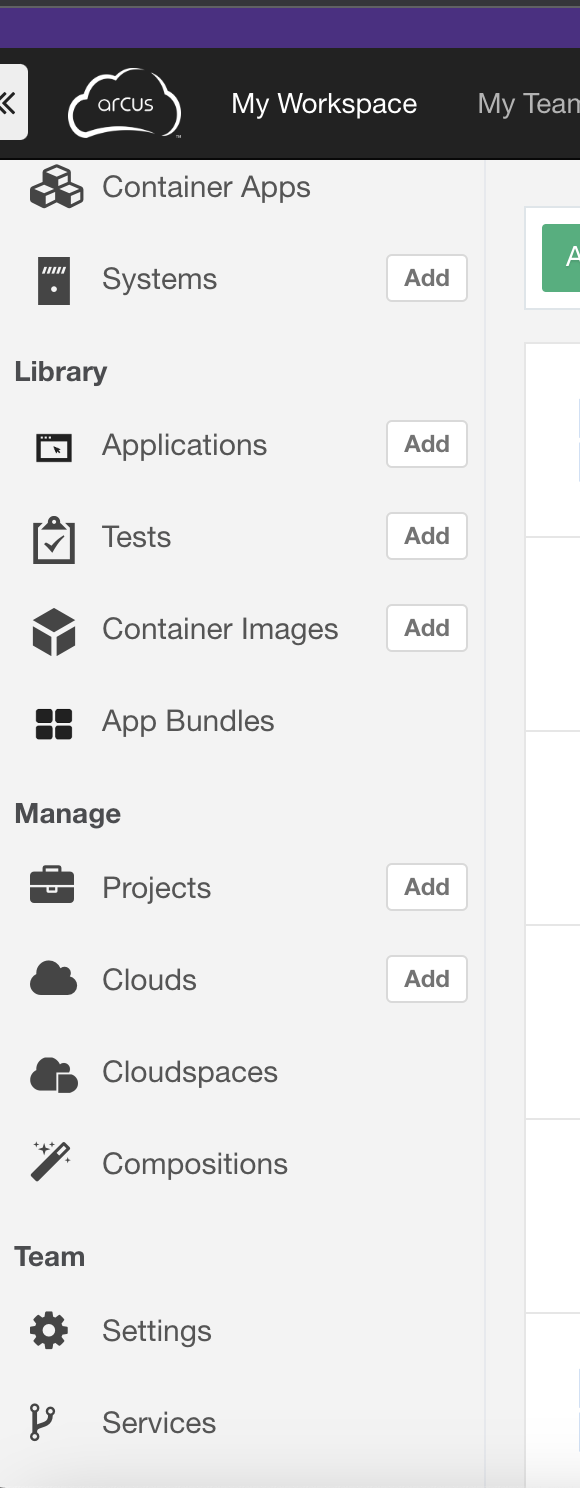
In Express Mode, you can add contact information at the Project level for users to know who to reach out to regarding their compositions. To add contact info for your Express Users, follow these steps:
-
Go to Manage Projects in the left hand menu
-
Choose your project

-
Go to Manage
-
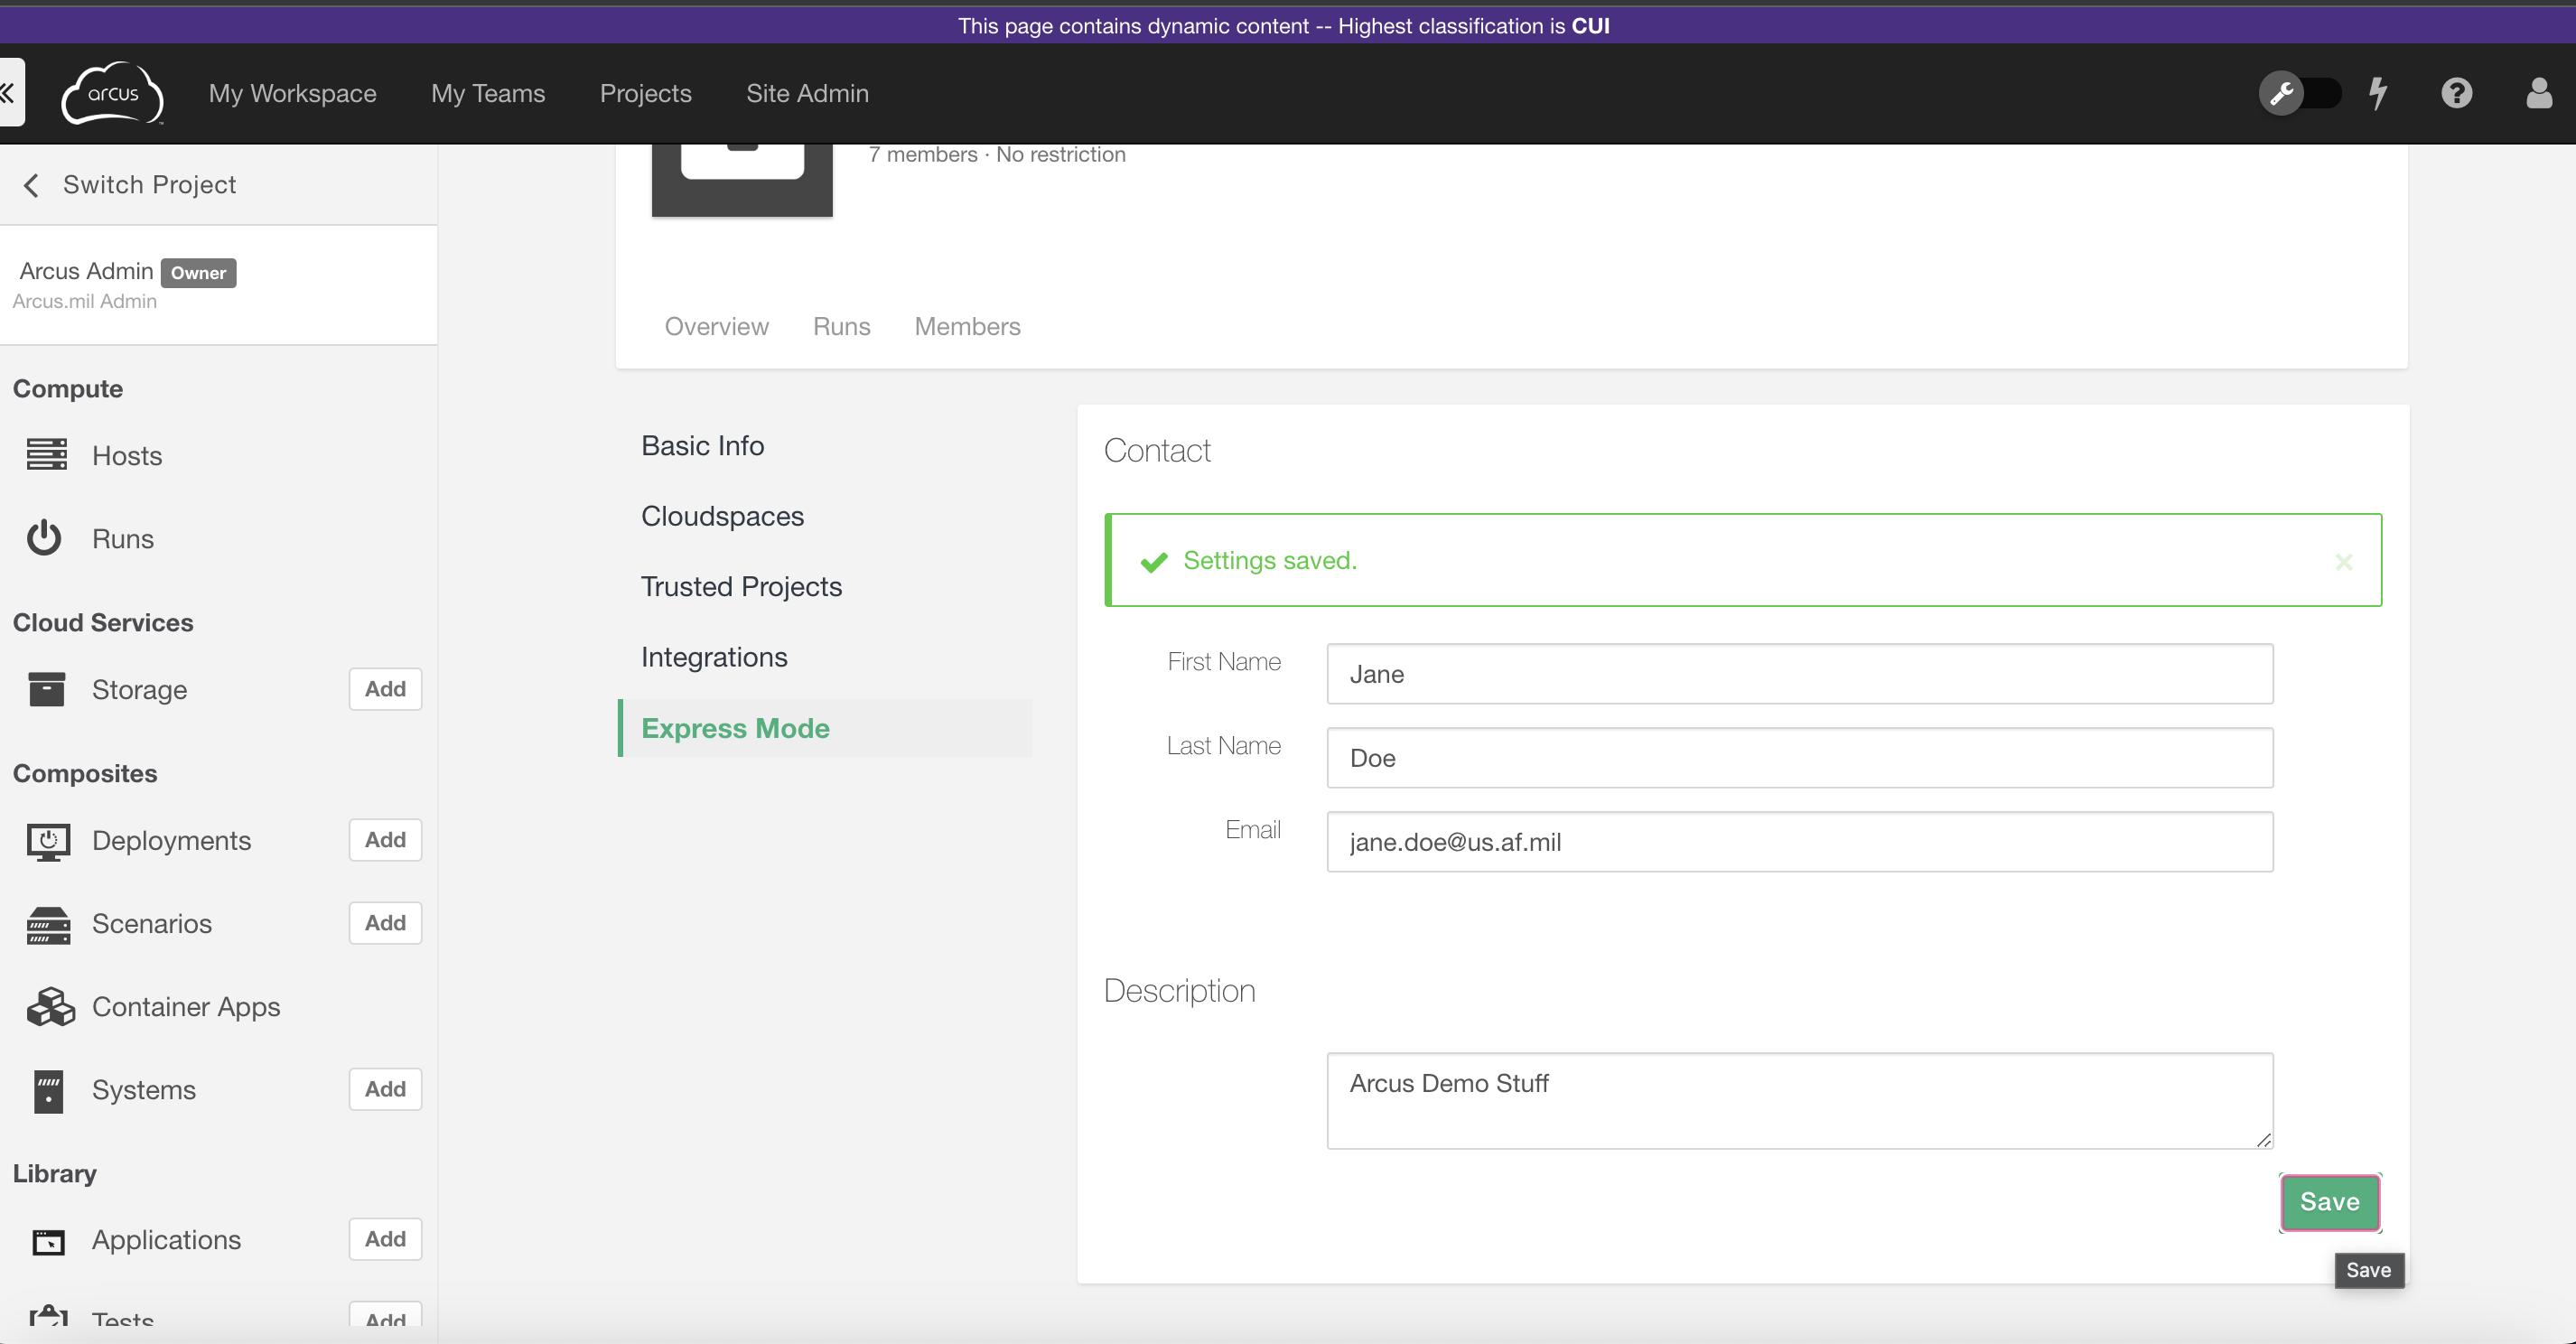
Go to Express Mode
-
When finished, your contact info should look like this in the Express User Interface, below the project name:
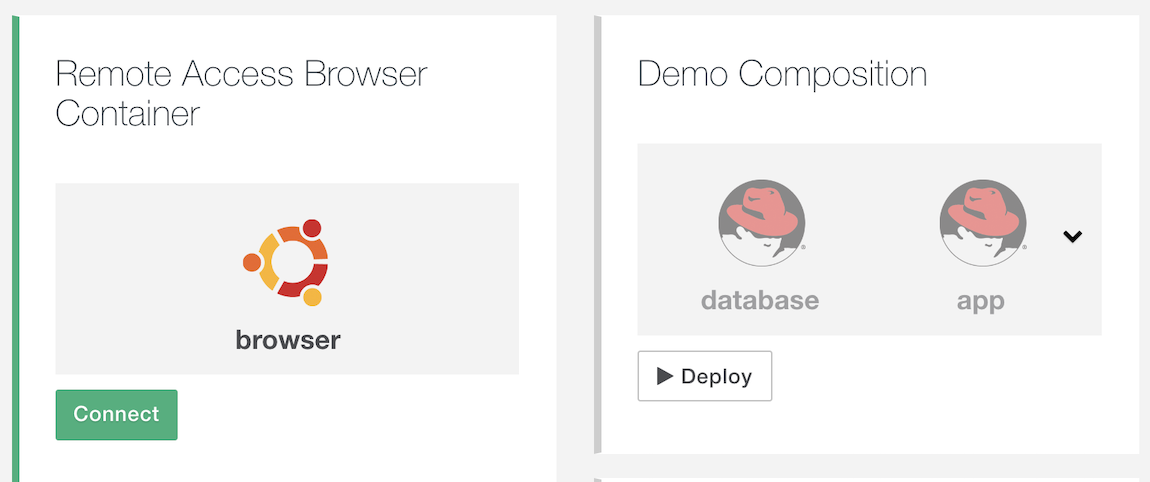
Deploying in the Express User Interface
Deploying in the Express User Interface is as simple as pressing a button! Any undeployed Composition can be deployed by clicking the “Deploy” button prominently displayed on each tile. Compositions that can be deployed can be easily identified by greyed-out tiles with the “Deploy Button” on the tile, and no “Connect” button visible for hosts. An undeployed composition is visible on the right in the screenshot below.
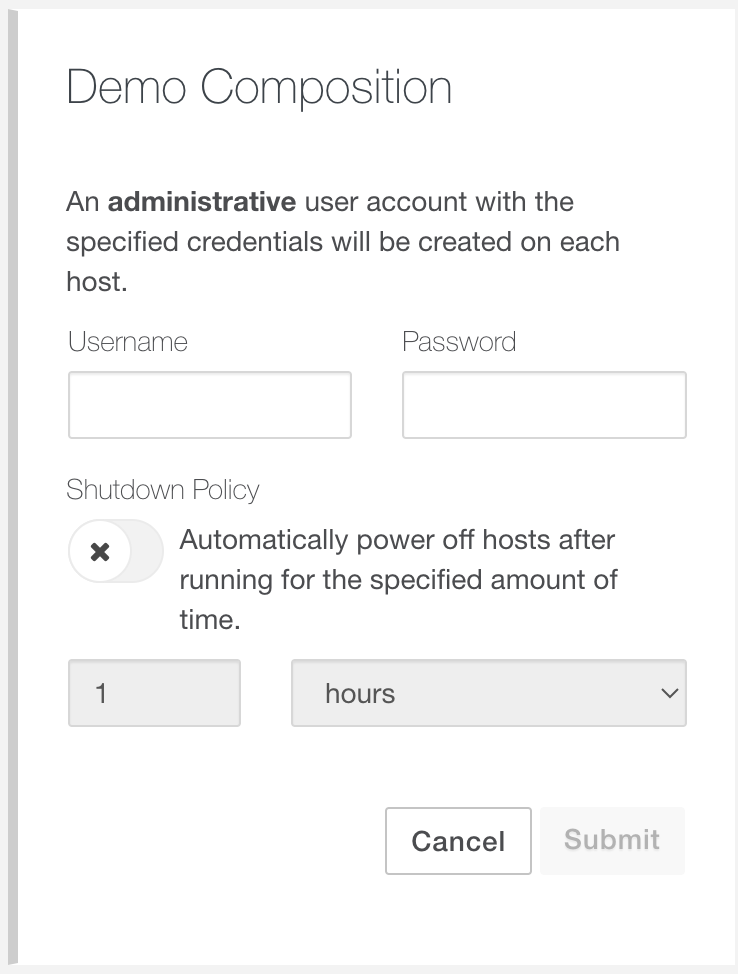
Clicking “Deploy” will bring up the menu displayed below. In the Deployment Menu, enter a Username and Password (these credentials will be treated as administrator credentials in the VM) and if desired, set a “Shutdown Policy” that can be toggled on or off, and select how long the Composition in question will run before automatically shutting down and undeploying. Clicking the “Submit” button will save these changes and send the command to deploy the Composition.
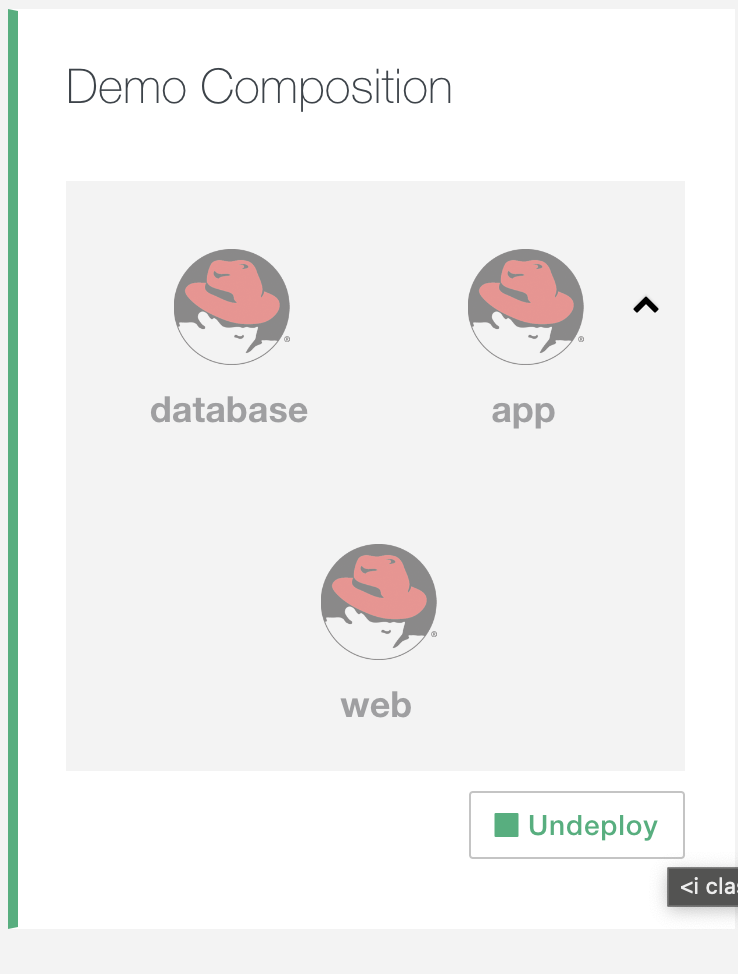
When a Composition you’ve deployed is in the process of deploying, the tile will remain greyed out, but an undeploy button will appear as shown below.
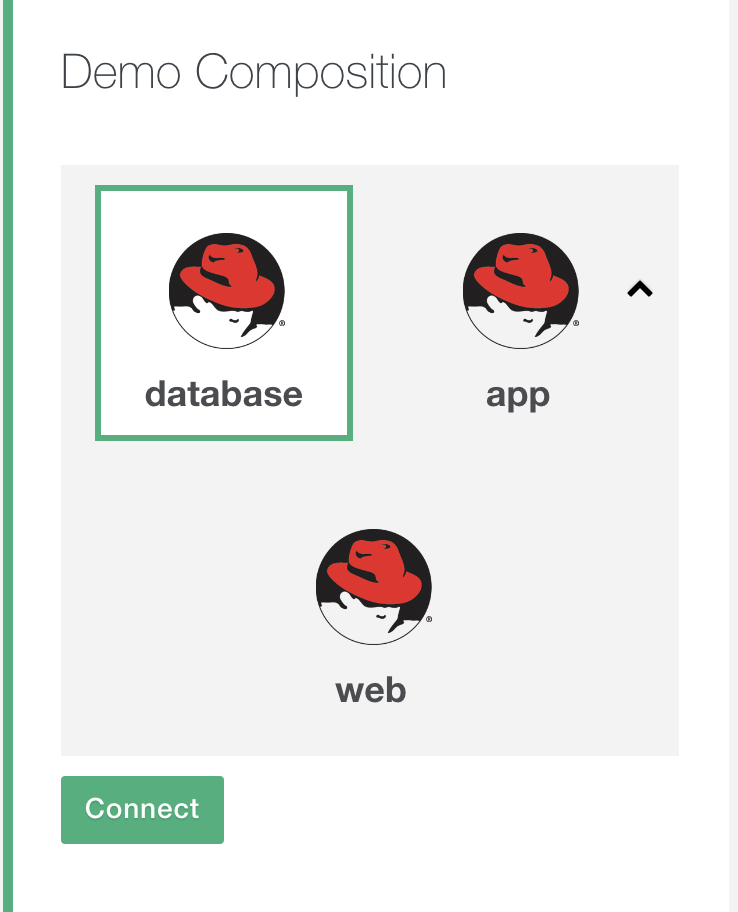
Once a Composition has been successfully deployed, the tile will have a “Connect” button. For a multi-host Composition, you will need to select a host to connect to before the “Connect” button becomes enabled. Clicking this “Connect” button will connect the Express User to their desired host.
Undeploying in the Express User Interface
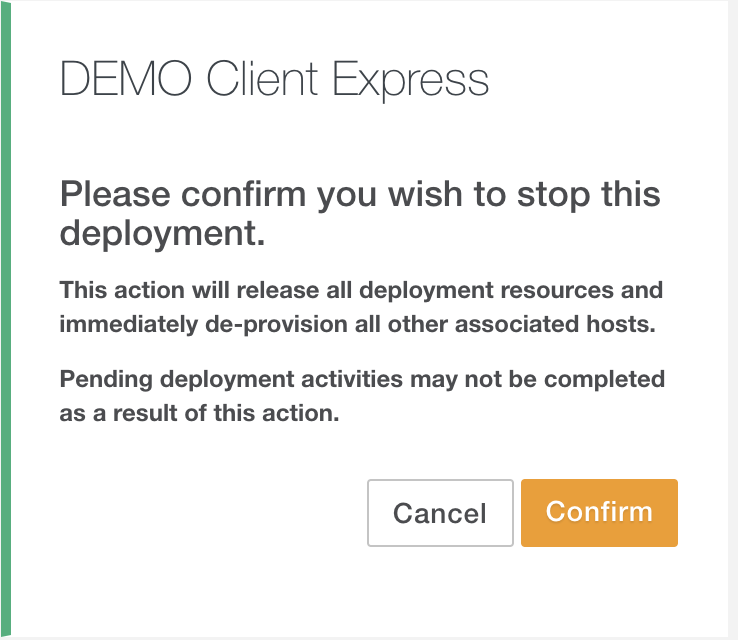
To undeploy a Composition that has been deployed, simply click the “Undeploy” button on a running VM. This button will only be available to the user that launched the Composition, will be greyed out if a Composition is still in the process of building, and will not be selectable until the Composition has finished deploying. When the “Undeploy” button is clicked, a confirmation dialog will appear as depicted below to confirm that the button was not accidentally pressed.
Once the “Undeploy” action has been confirmed, the host(s) will be greyed out, and has a similar effect to the “Building” state that occurs when a deployment is in progress. When the undeploy is complete, the tile will be greyed out, without any connect button for the host(s), and is ready to redeploy at any time.
Connecting in the Express User Interface
Connecting to a deployed run in the Express User Interface is as simple as clicking the “Connect” button for the desired host. When there is a single-host Composition, the tile’s “Connect” button is always associated with that host. For multi-host Compositions, you will first need to select a host to connect to before the “Connect” button becomes enabled. Clicking “Connect” will open a remote access session in a new window. For “Published” active Deployment Runs, Express users will not have the option to Deploy or Undeploy, their only option will be to connect to a host.
More Help
Review this topic with our video tutorials: