Container Images
Topic:
Assets
What is a Container?
A container is a unit of software which packages up all the code, along with its dependencies, so that it can run quickly and independantly in any computing environment. Each container has a Container Image, which is a standalone executable package that includes all the essentials to run the containerized application, including the code, runtime, system tools, and system libraries.
Containers can be used to run both Linux and Windows-based applications. The software inside a container is isolated from the environment, allowing them to perform consistently, regardless of the environment it is running in.
Containers in Arcus are considered a Component asset. Component assets are developed by you and other Arcus users, and imported into Arcus for use in your Systems.
Creating a Container Image
In Arcus, there are two options for creating container Images:
- Use the Container Builder
- Create and import your own container image zip file
Using the Container Asset Builder
If this is your first time creating assets in Arcus, we highly recommend that you use the Container Builder. If you are a more advanced user and are comfortable with creating your own asset.properties files, feel free to proceed to the section on importing your own Container Image.
You can easily create your own Container Image Assets using the Container Builder. To get started:
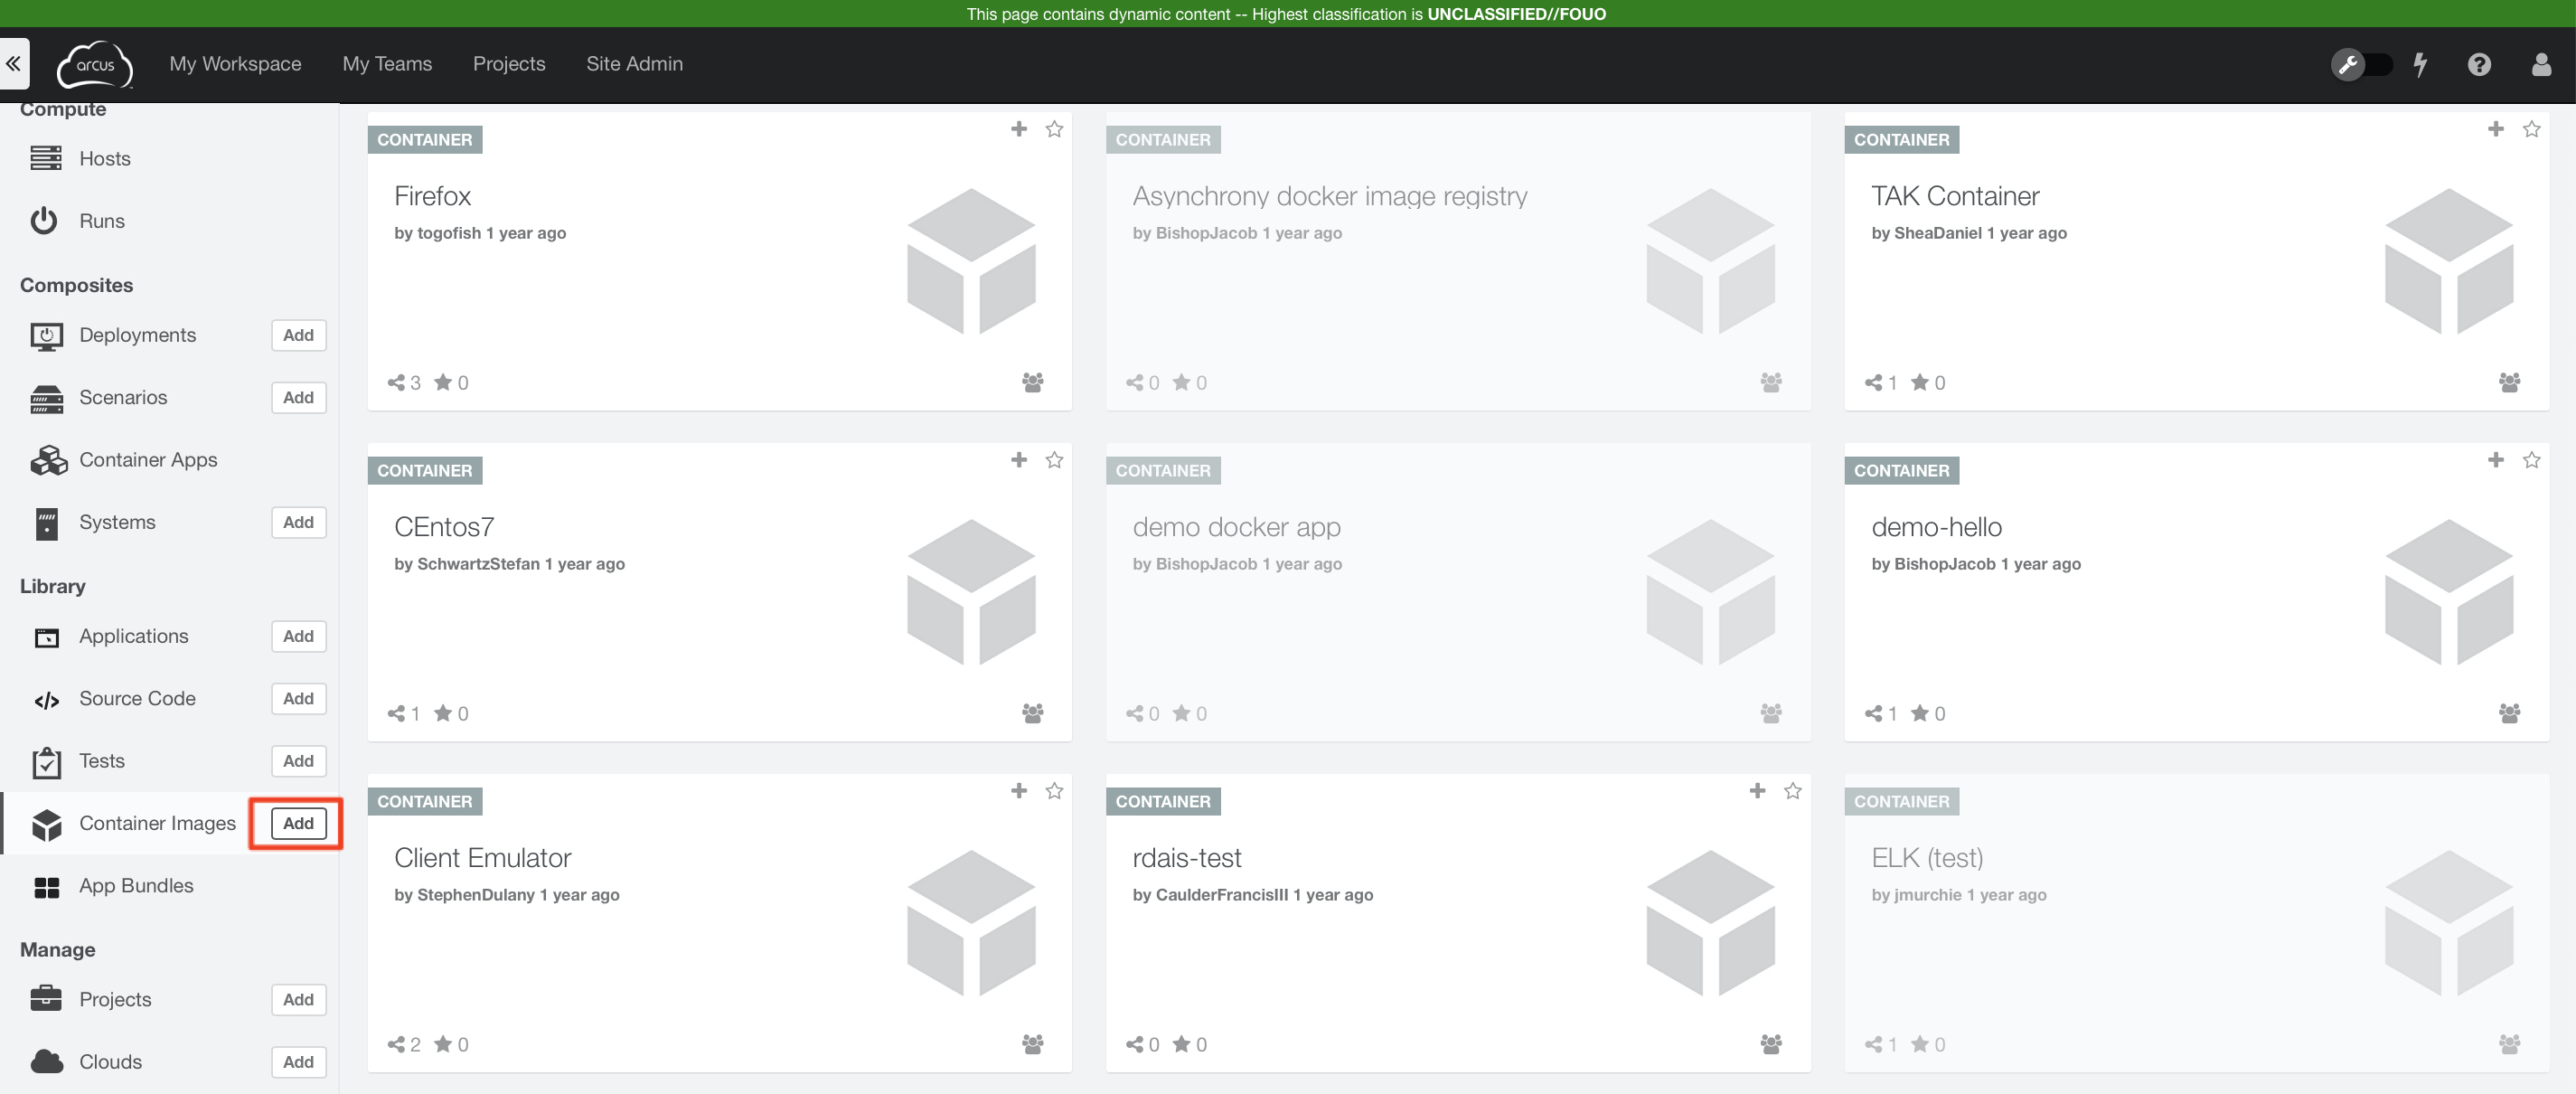
- From the main menu, click on the Add button next to Container Images
Note: if you do not see the Add button, your user account may need additional [permissions](https://arcus-cloud.io/kb/user-permissions/"Roles and Permissions") in your project.
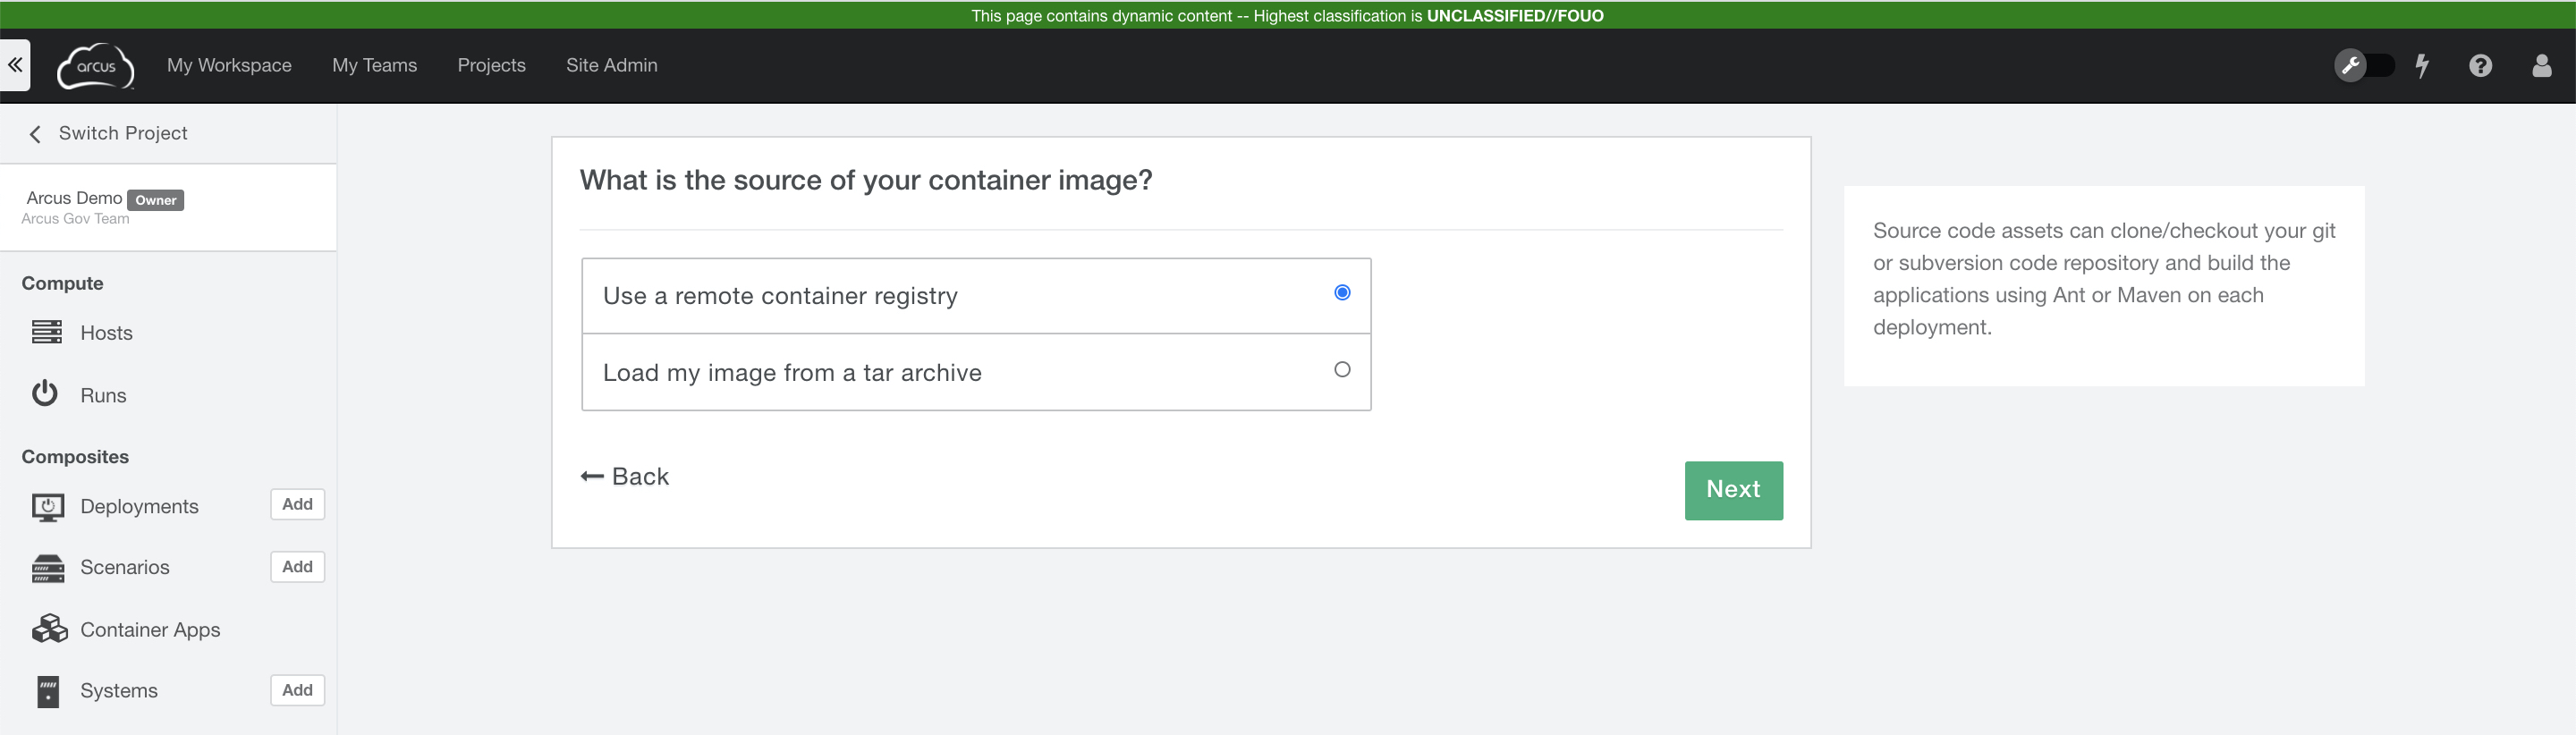
- Select the “Use the container builder” option, and click Next From here, you have two choices:
- If you need to pull your container from an external directory, select “Use a remote container registry”
- If you already have a container tar archive ready to go, click “Load my image from a tar archive”
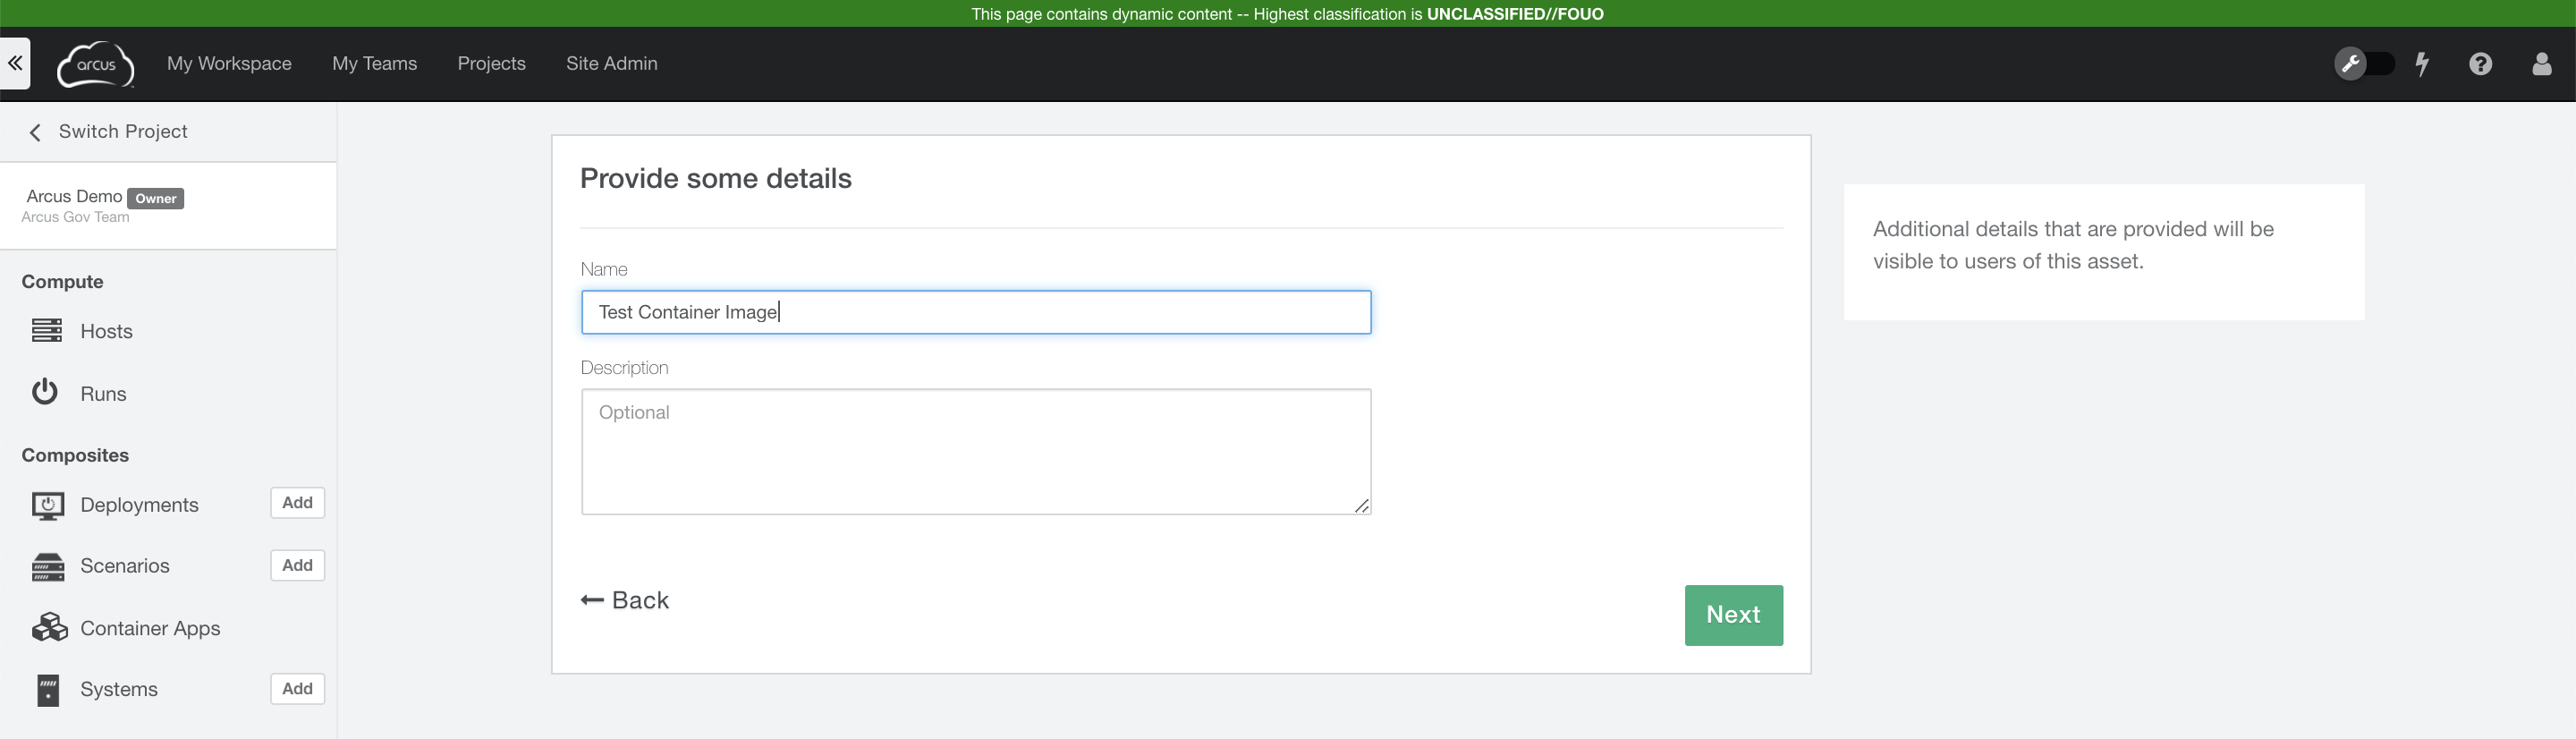
- Regardless of your choice in the previous step, you will be prompted to “Provide some details” by adding a name for your container image asset, and adding an (optional) description
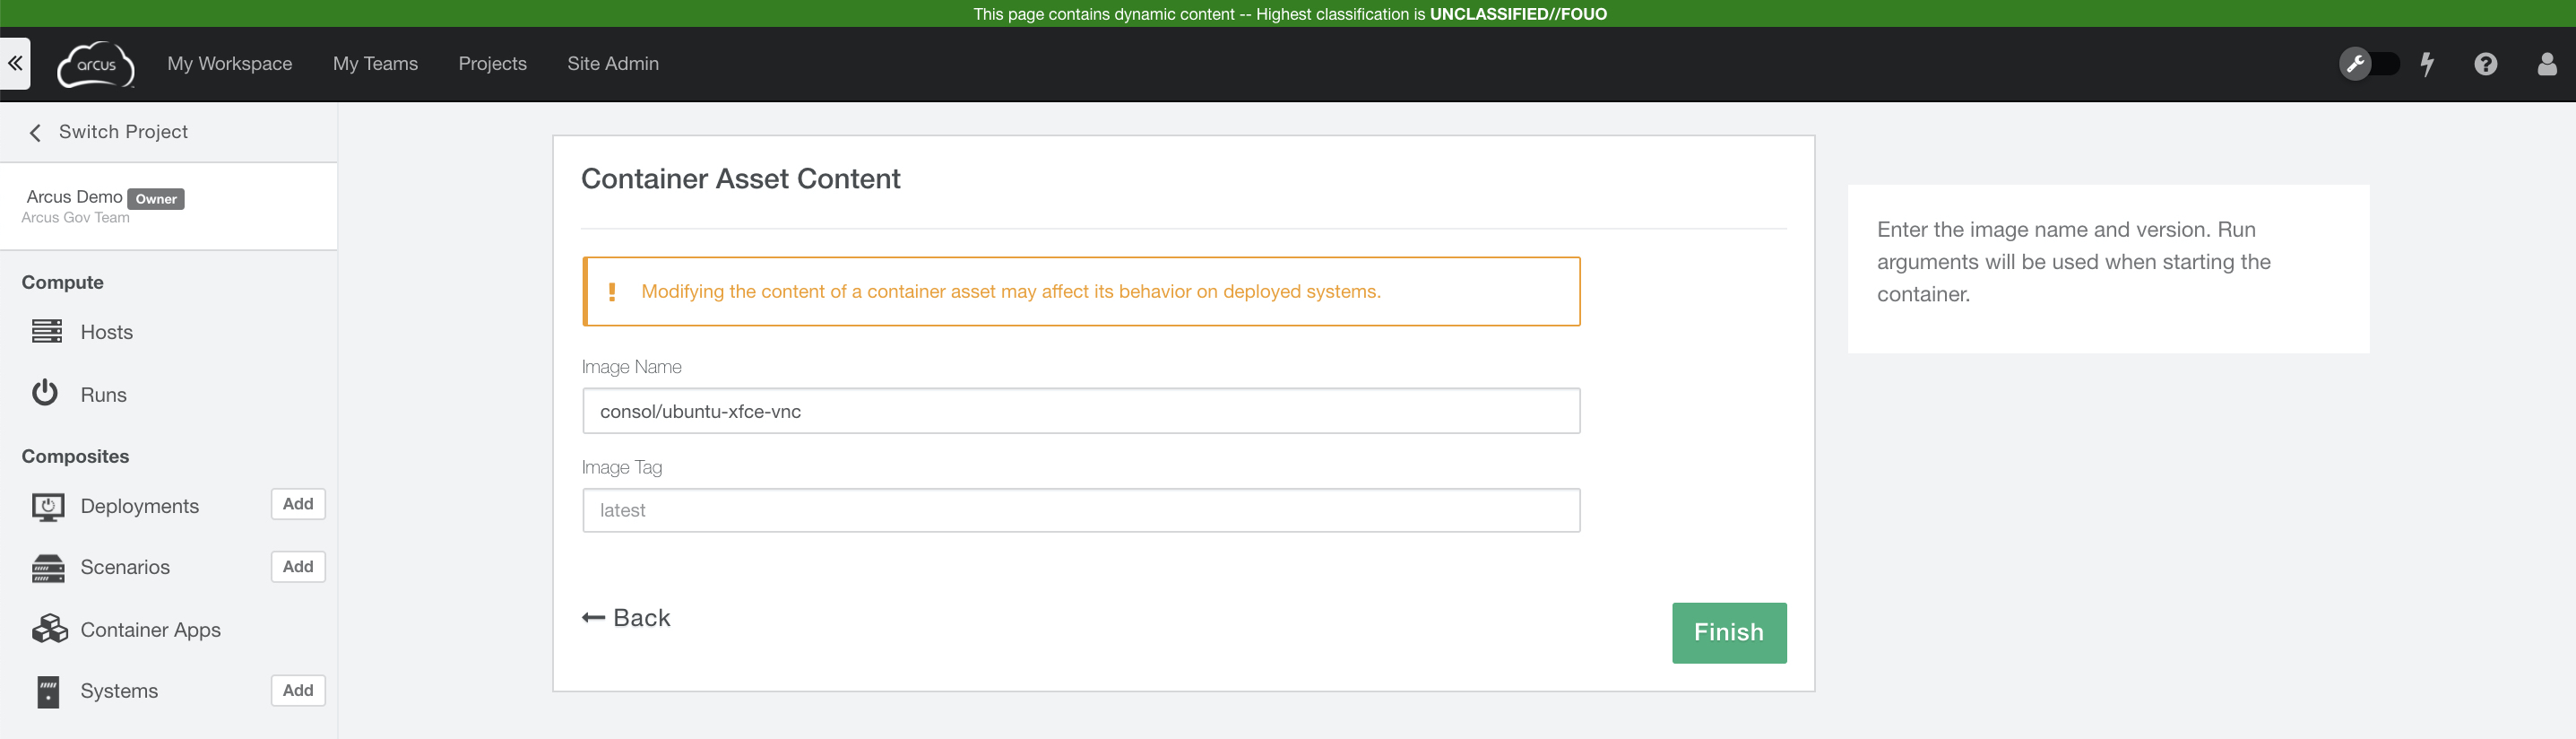
- At the Container Asset content step, you will be asked to provide:
- If you selected the remote directory option, you will need to specify the image name that you are retrieving and the image tag (if any). If the image tag field is left blank, it will default to searching for “latest”
- If you selected the local upload option, you can add media up to 4 GB. You can choose to either upload a single local file, or add a remote URL to automatically fetch remote content. The remote URL must be the location of the remote file, not a redirect or require some sort of approval or manual selection. Note you can only include one file, and it will end up in the media directory of your asset. If you need to include more than one file in your asset media, we recommend creating a zip file. If you would like you have multiple files in your media directory, click Back and use the “I have an archive with a properties file” option.
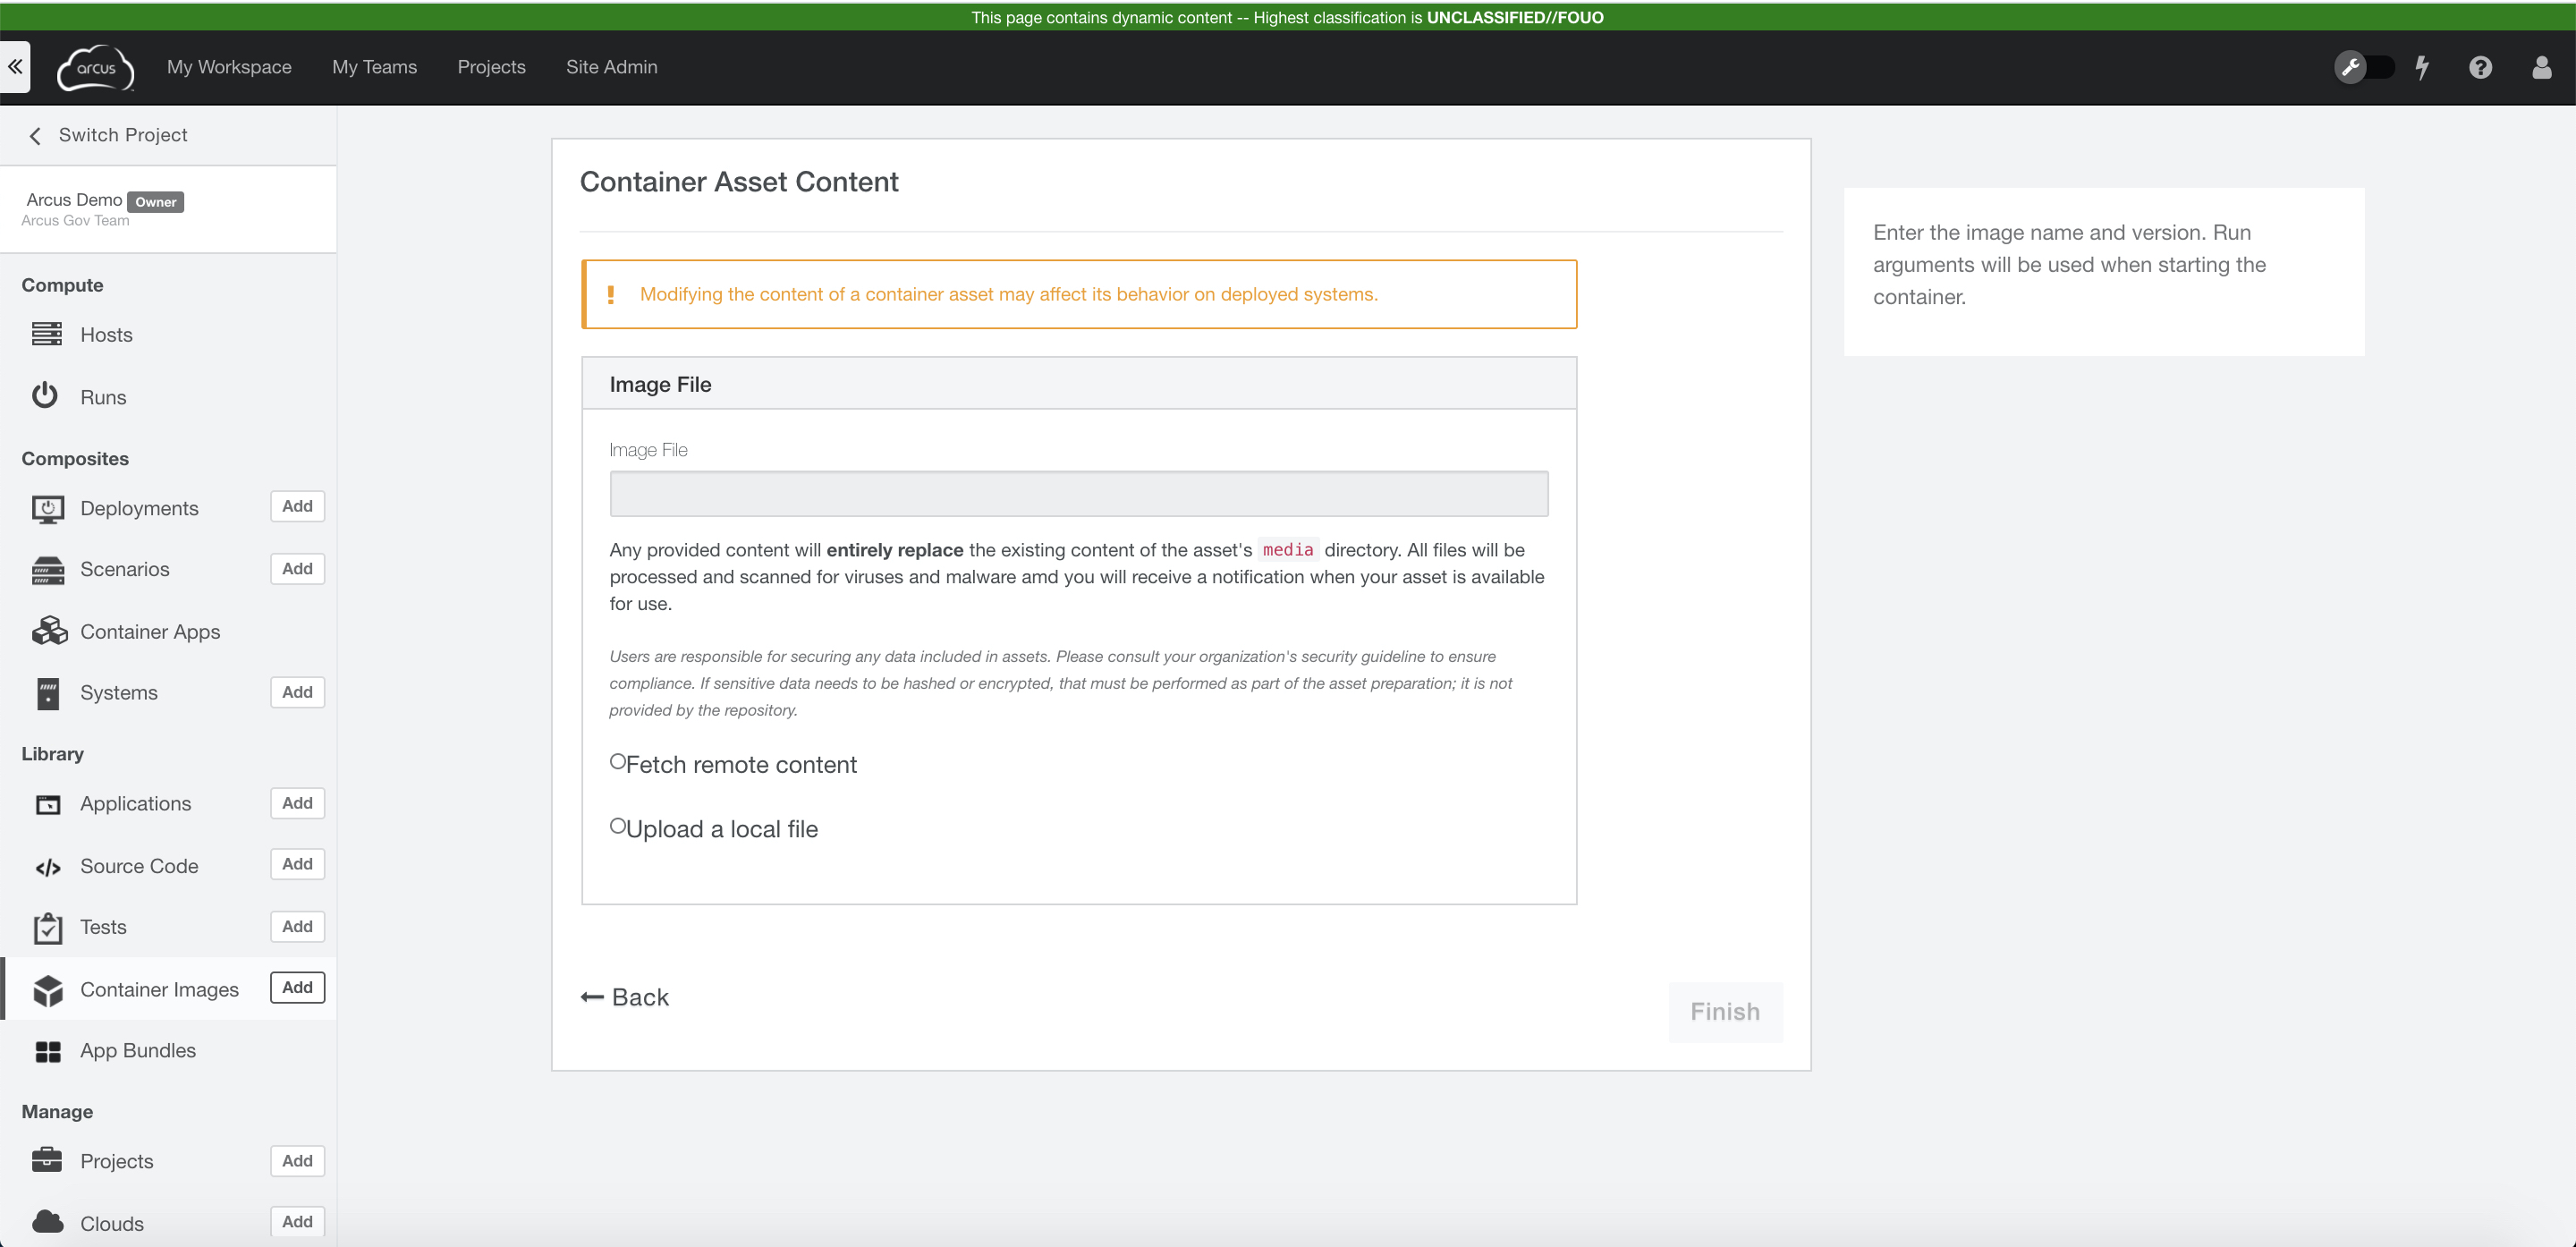
- Click Finish
You will find your asset located under Container Images on the main menu
Please enter a support ticket if you need to import a container image asset larger than 4 GB.
Using a Container Image Zip File
Creating a Container Image Asset Zip
- Create your asset with the files and directory structure as shown in this article
- Zip the contents of the asset directory.
NOTE: Do not include the top-level directory (folder) in the zip file (aka, only zip the contents of the asset directory, not the folder containing the contents).
- Import it into Arcus using the steps under “Importing your Container Image Zip” below
If you need an example of a container image asset file structure, feel free to utilize the example we have made available on GitHub.
Sample Container Image Assets:
Importing your Container Image Zip
Once you have created an asset zip file according to this article, you’ll want to import it into Arcus. To do so:
- From the main menu, click on the Add button next to Container Images
Note: if you do not see the Add button, you need asset developer permissions in your project. Contact your Team Manager or Project Owner to set your project permissions.
- If you have an Container Image asset zip file to import, click on “I have an archive with a properties file” and click Next
- Drag and drop, or browse and select your Container Image asset zip file
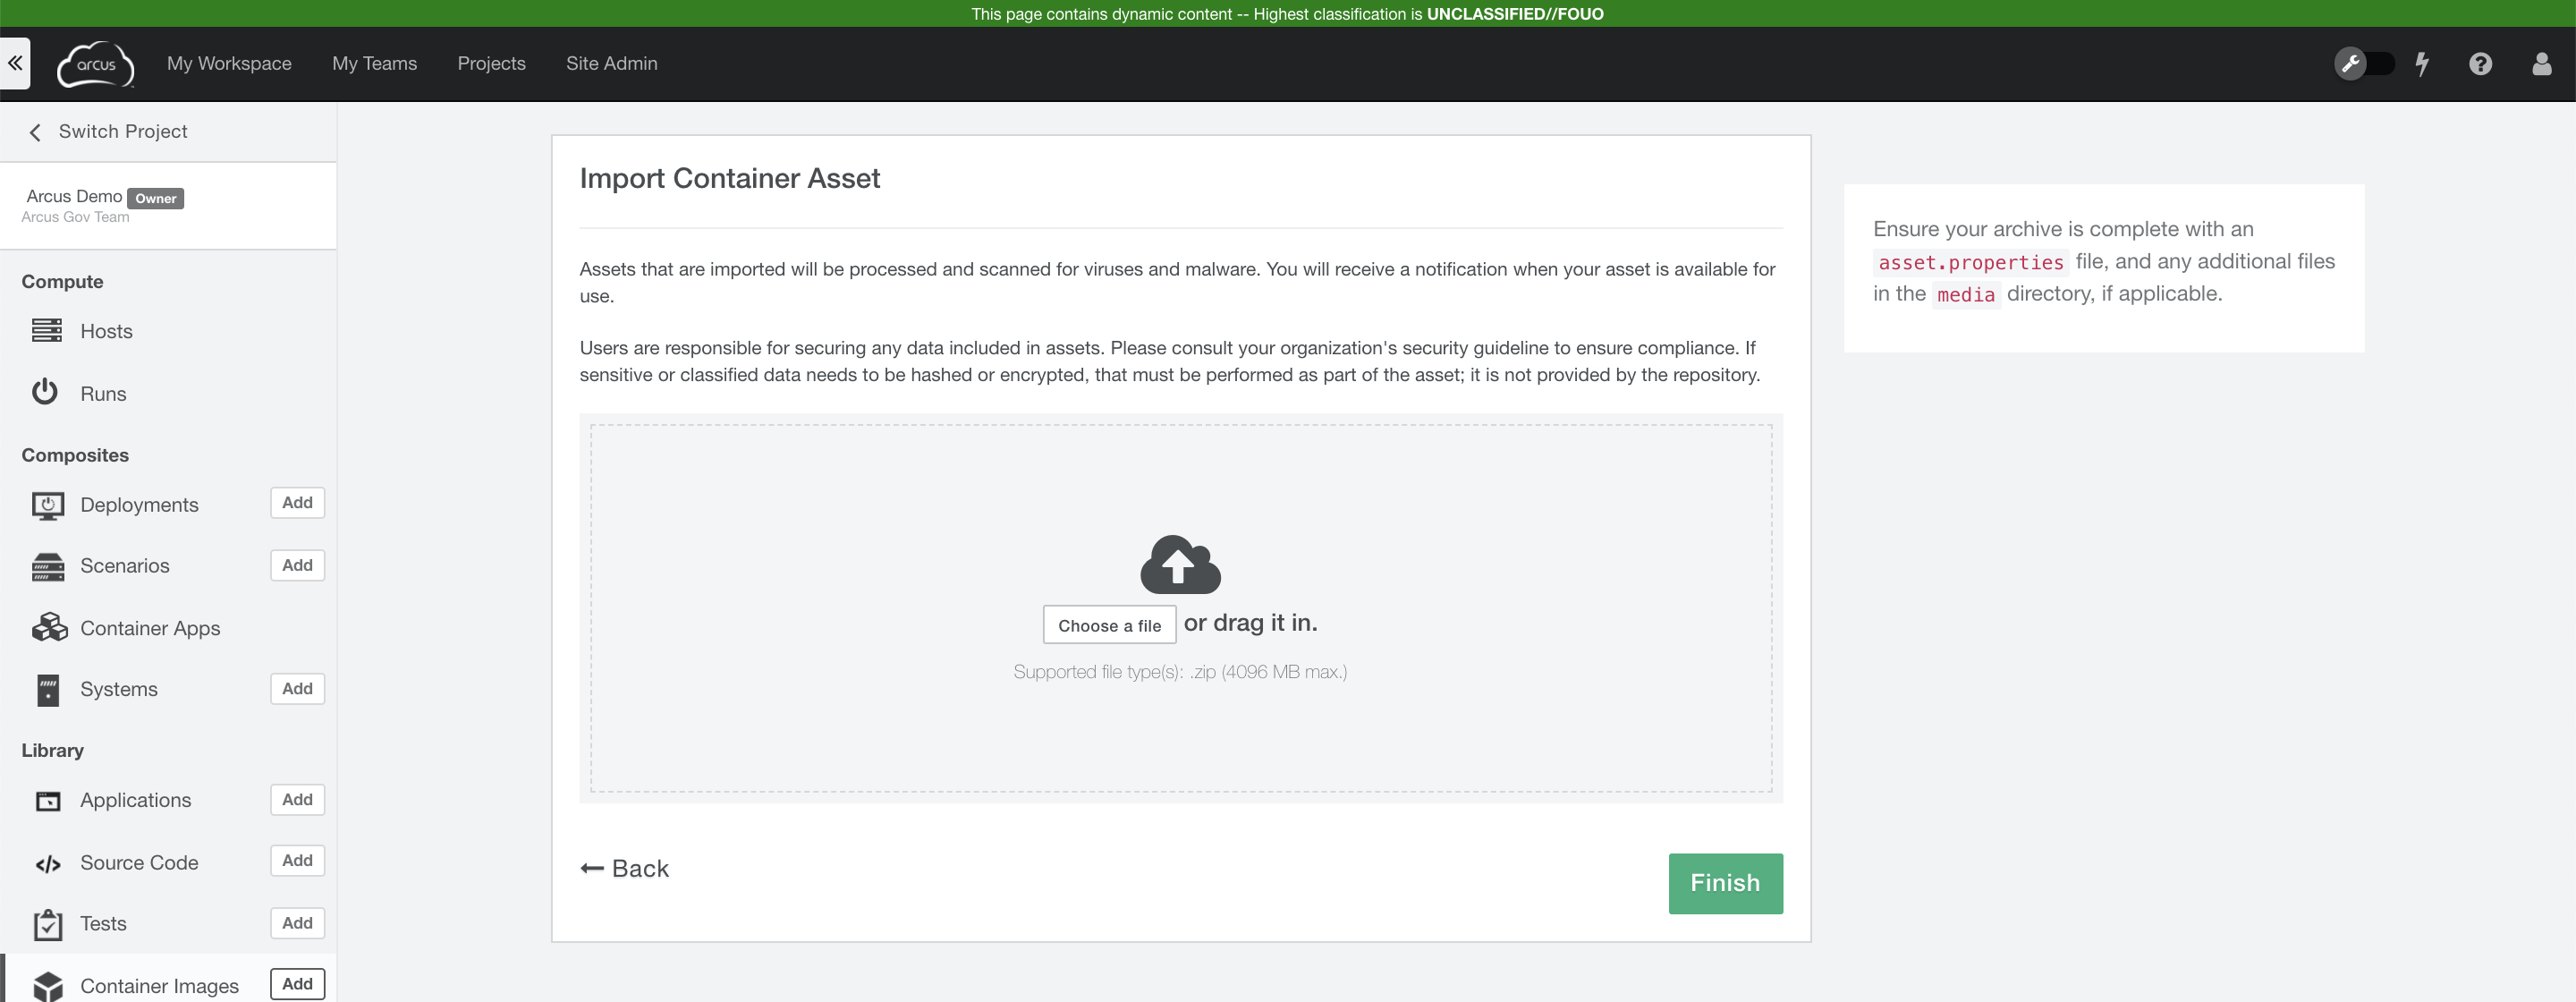
- You will see a file transfer bar at the bottom right
- Keep an eye out for error notifications at the bottom left, in case any asset structure issues were detected
- You should receive an email notification if your asset import succeeded, if it fails the notification will provide details:
- If Arcus finds a problem with the asset
- If Arcus detects a virus or malware in the asset. If you feel this is in error, please contact support
- If you are having trouble importing your asset, see the section below for some typical troubleshooting steps
Troubleshooting Asset Imports
If you imported your asset but did not receive an email notification with a specific error message, please check these items and re-try your import:
- Ensure your asset zip file was zipped at the contents level, and the parent directory was not included in your asset zip file
- Ensure that the asset structure is correct as described here
- Ensure there are no files at the root of the asset except the
asset.properties, license, and readme files - If license and readme files are included at the root, ensure the
documentationFileandlicenseFileproperties have the correct file names
Using your new Container Image Asset
Once you have created your Container Image Asset using either of the methods above, you will be ready to incorporate it into your Arcus workflow like any other component asset. Typically, users will add container images at the system level, along with any other software, or source code component assets. Under step 3 in this KB article, this process is described in detail.
Likewise, if changes are needed to the Container image, the asset can be edited in a similar fashion to any other software asset, and the steps to edit a component asset is located in this KB.
Of course, if you run into issues, or would like to discuss specific software or flow feasibility, feel free to contact support and we’d be happy to assist you.
More Help
To see the concepts discussed in this article in action, consider watching our YouTube tutorials: